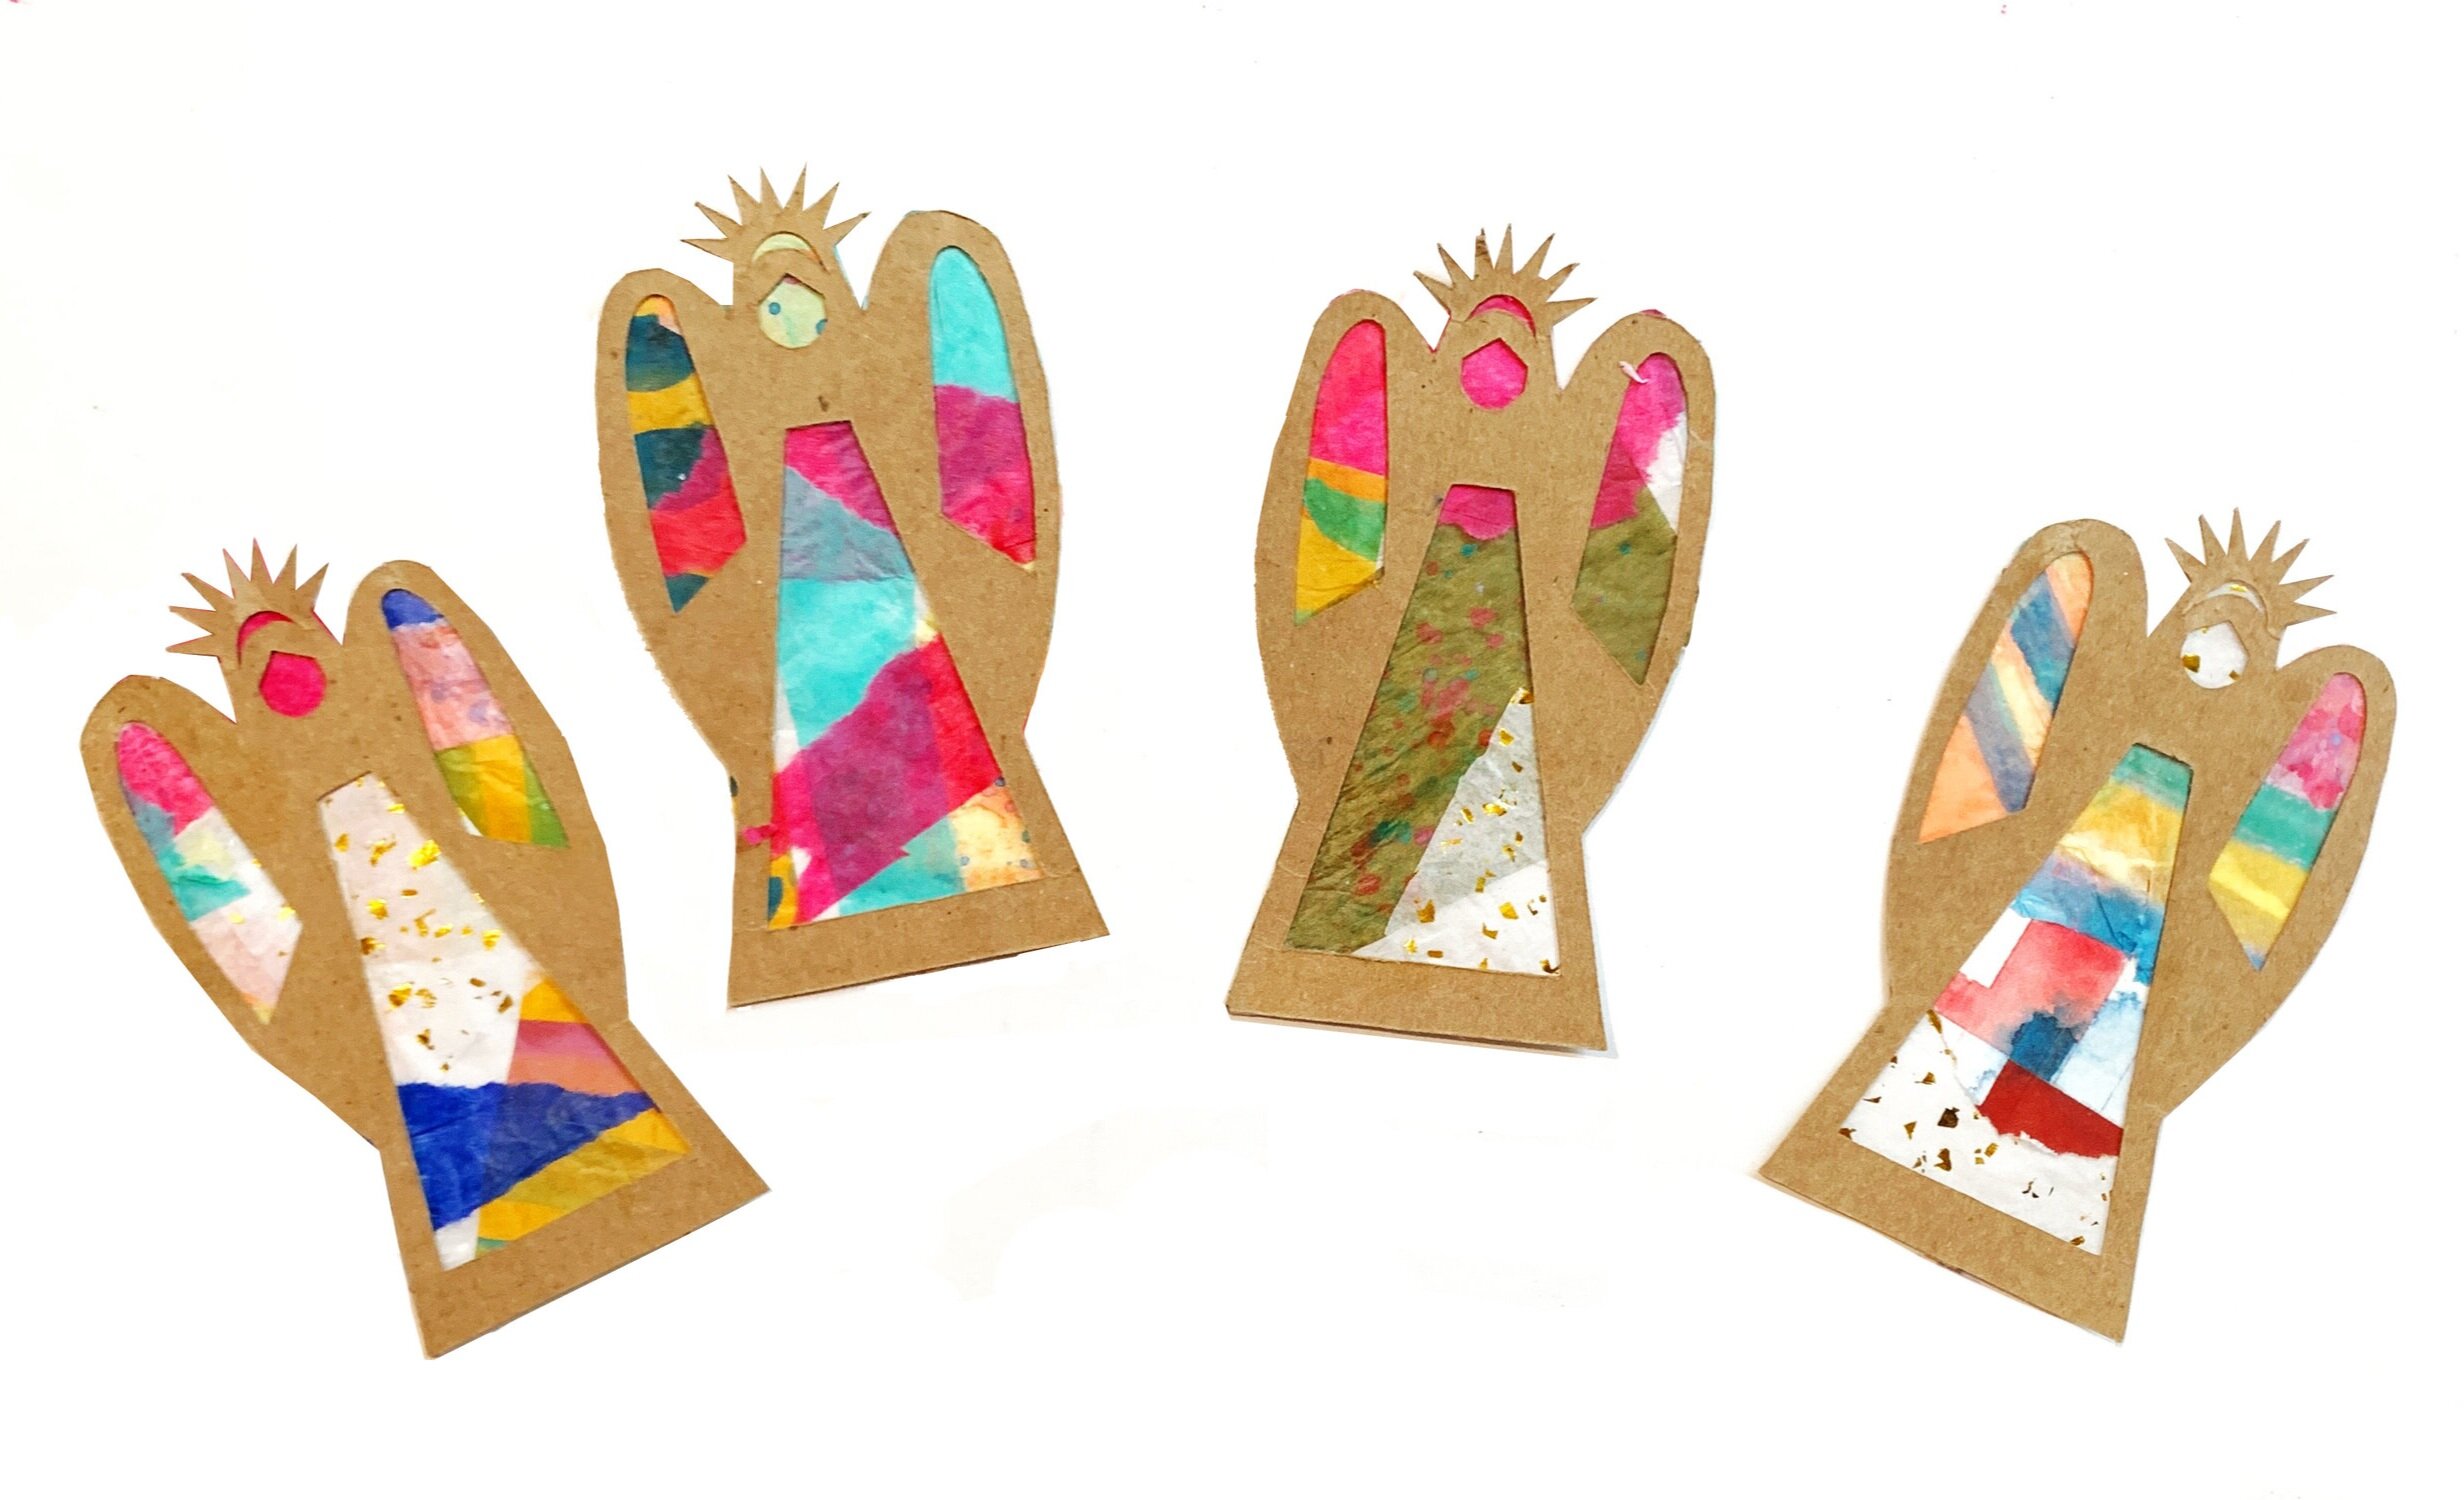
Stained Glass Collage Angels
How wonderful it must be to speak the language of the angels, with no words for hate and a million words for love.
-Eileen Elias Freeman
grab the complete STAINED GLASS ANGEL project PDF + Printable pack here:
Today is the official kick-off of CRAFTMAS - year 3! We know you are busy, busy, busy with life and school and work and kids and holiday plans.. but we want to inspire you to hit the pause button on the busy, take a breath, and carve out a little time for a creative escape. With this goal in mind, we are tweaking CRAFTMAS a bit this year: we aren’t waiting until December, we are getting this party started today to give you more time to make (all the things🤗) and we are keeping it S I M P L E. Every project featured will be made from basic supplies that you most likely already have in your stash:
chipboard/cereal box
egg carton/milk carton
paint (watercolor, acrylic, tempera)
pine cones
dough (salt dough, air dry clay, model magic, play dough)
** Please note that we participate in the Amazon Affiliate program. This means if you purchase any of the products linked here we will receive a tiny sales commission at no additional cost to you. We only link to products we use and love. Your support helps us keep this site running - thank you!
If you are scratching your head thinking what the heck is Craftmas? It is the brainchild of the lovely Laura from Little Button Diaries. It’s essentially a week of holiday makes from an international crew of artsy crafty bloggers and instagrammers. This is the third year we have participated. Year one we made 3 no-sew garlands. Year two we made these snowy woodland shadow boxes and this year we made (we can skip the drum roll) Stained Glass Collage Angels.
We are kicking things off with two super friendly and readily available materials:
CARDBOARD CEREAL BOX + TISSUE PAPER!
Materials:
cereal box
assorted colors of tissue paper
glue (school glue or mod podge work well)
paint brushes for painting and gluing
good pair of scissors and/or x-acto blade for fine details (adults only)
baker’s twine for ornament
** this post contains affiliate links. We receive a small % of any purchase you make using our links at no additional cost to you. We only link to products we use and love. Thank you for your support!
I feel like I need to start by saying this process is pretty straight forward and there are quite a few ways you could approach it. We decided on a medley of hand painted and colored tissue bits for our stained glass collage. So step one for us was a painting tissue session. We decided to use watercolor but you could certainly use thinned down tempera or acrylic. Important to not drench the tissue paper sheets. We dabbed our brush a bit before we applied the color to the tissue.
When your painted tissue is dry you will cut and tear it up. If you are working with young kids I would suggest laying a piece of white tissue down as a base and creating a collaborative tissue paper canvas. Overlap your colors and textures in interesting ways and you will create the most beautiful stained glass effect! You can use pretty much any glue for this. We are big fans of mod podge but thinned out white school glue does the trick too! Could you use a glue stick? You could but you would likely tear your tissue. I suggest using a liquid adhesive with a brush!
Our printable angel template pack comes with 4 ornament sized angels and a bigger tree topper/ 8.5 x 11 frame sized version. There are so many ways you can use this printable. For this project we used it as a cutting template for our cereal box cardboard but you could also just print it out on 60 lb. card stock and skip the transfer to cardboard step. The printable sheets make lovely coloring pages. You can decorate them and string them up as a garland! Reduce the size in your printer settings and make a lovely little necklace..I can definitely see these coming in handy for the holiday craft table!
Once you have created your cut out angel frame you will use it kind of like a viewfinder to find the perfect spot on your collage canvas. When you have found “the spot”, simply add some glue (we used glue stick for this step) to the back of your cut-out and press down! I think this “tissue canvas” approach is the way to go. Older kids can rip and tear independently and glue directly to the back of their angel piece by piece if they aren’t into the collaborative canvas idea.
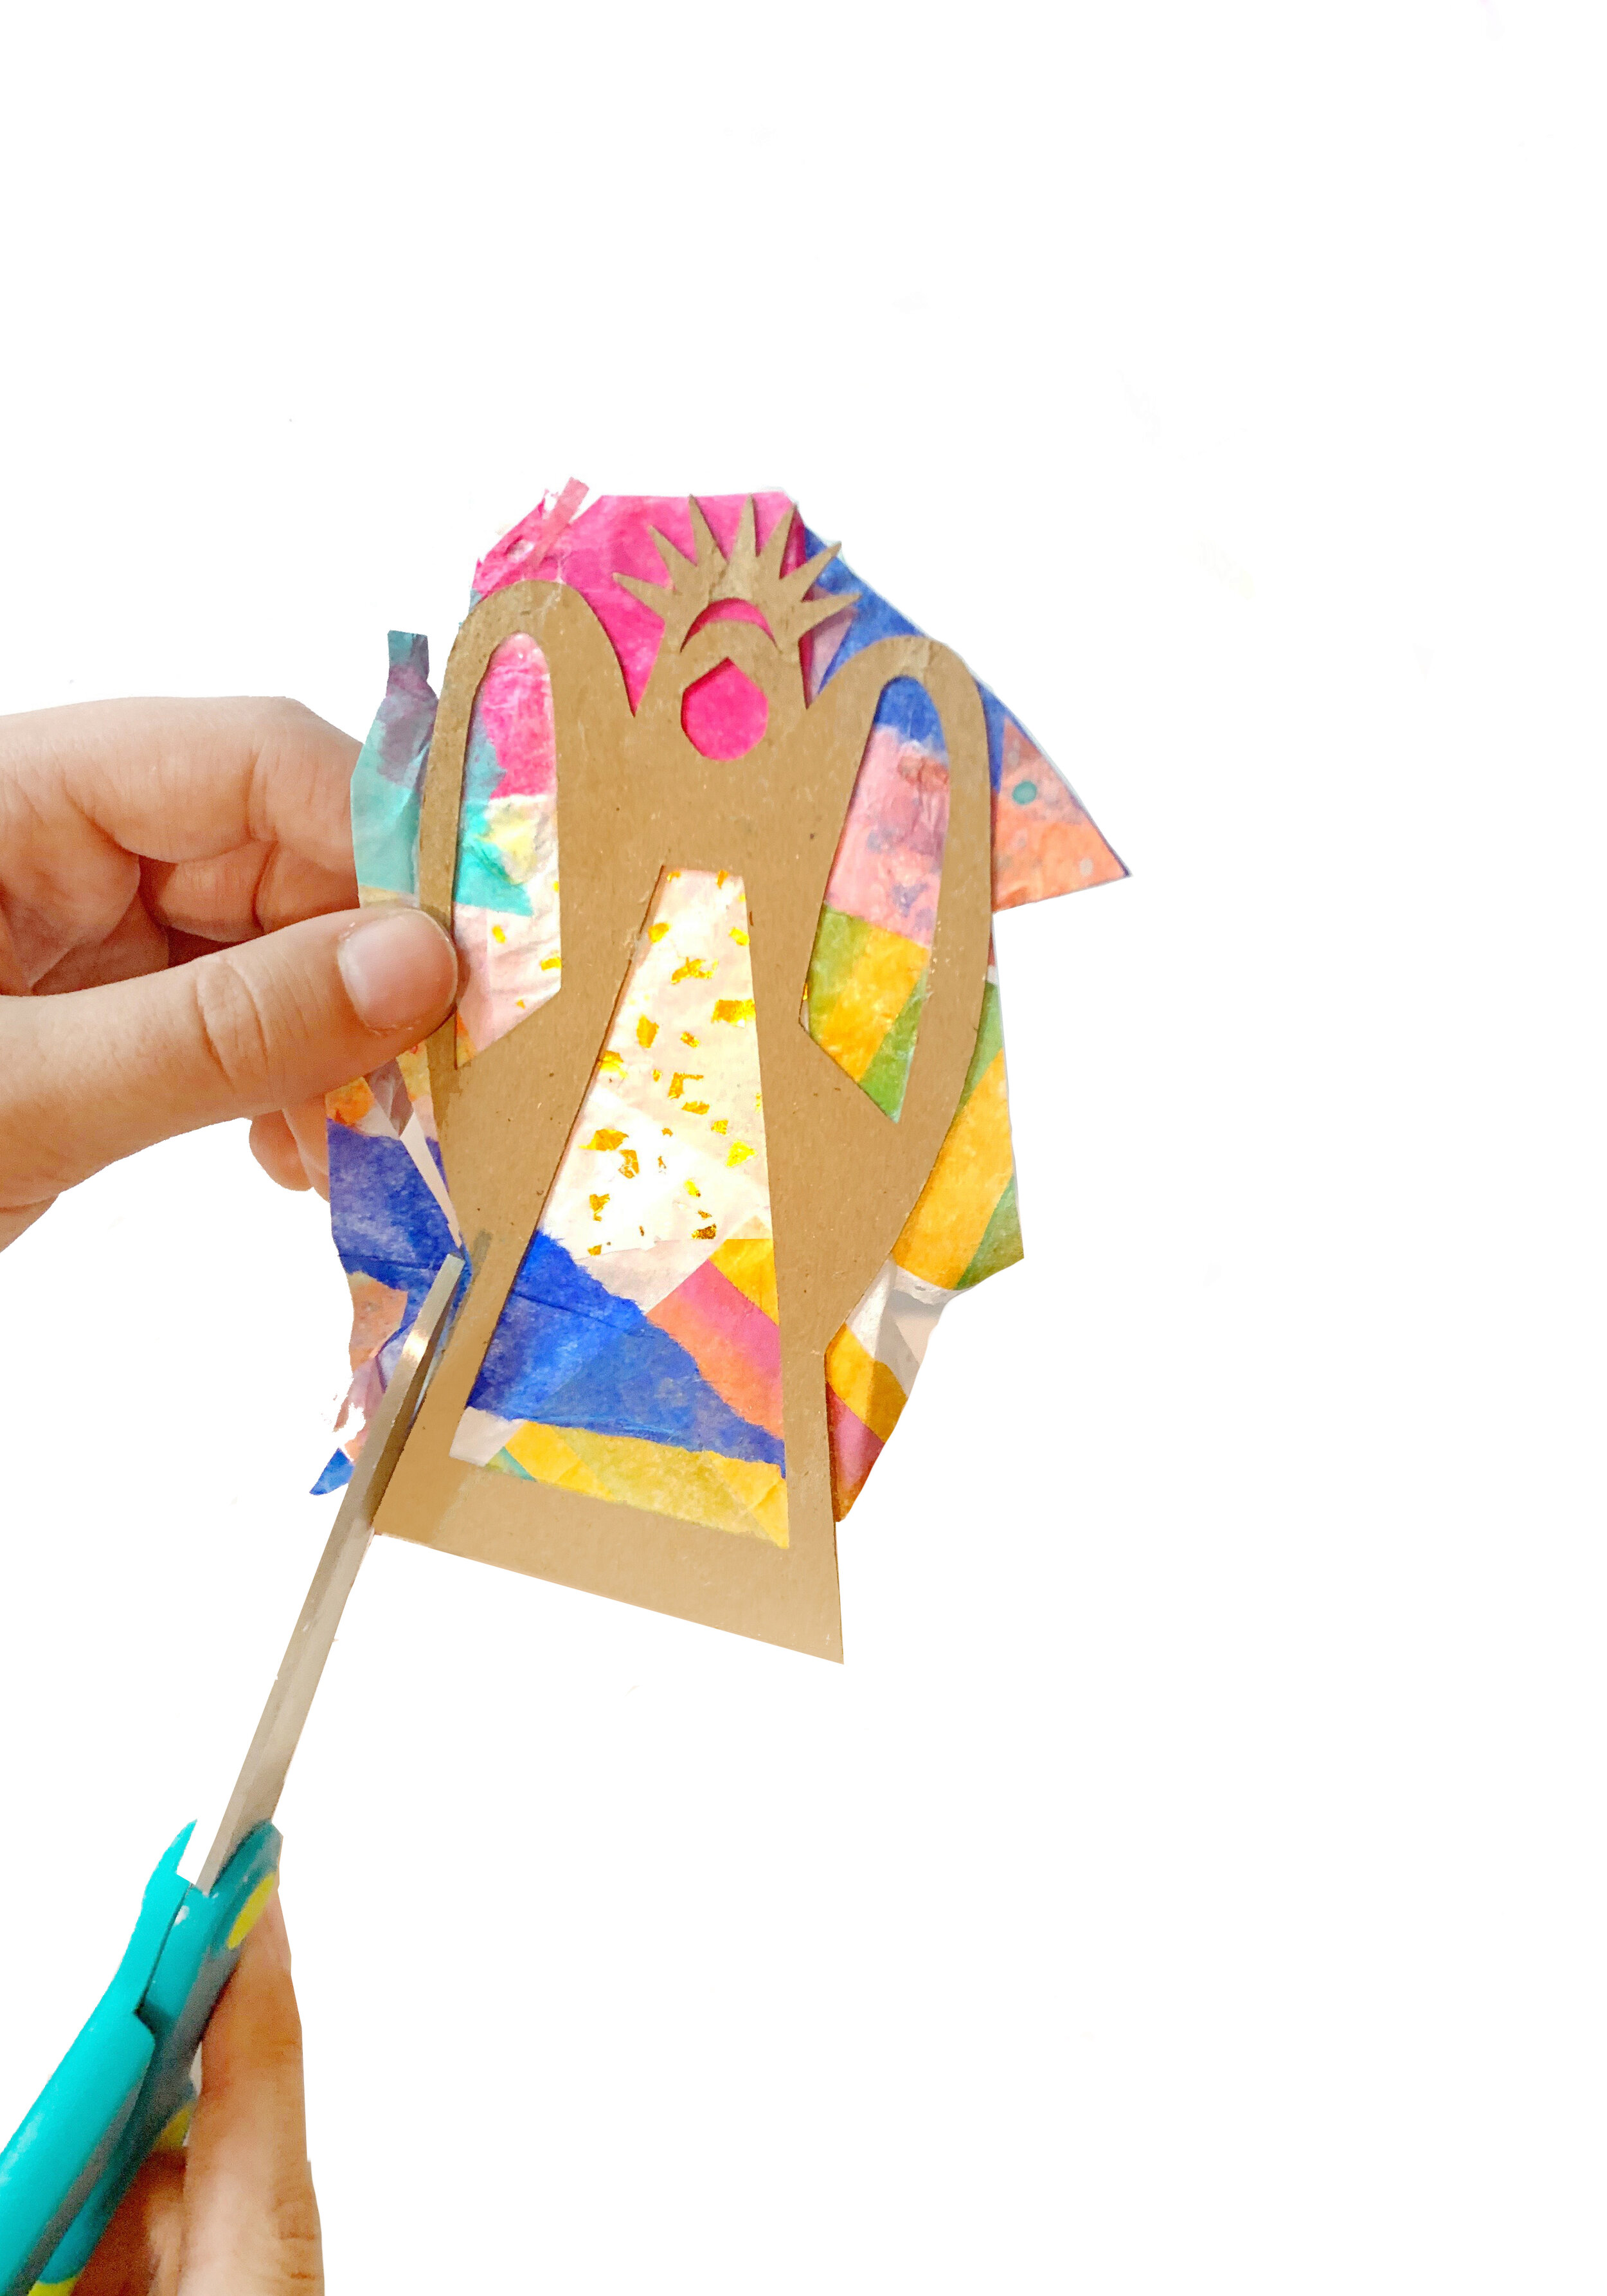
Once your angel is glued down you will trim all excess tissue. Word to the wise: You are going to want to avoid the zig and zag of that crown. Just glue a little piece of tissue behind the small curved opening.
If you have a kiddo (I have one) who wants to do their own thing from start to finish. Just give them some tissue and have them paint. The angel frame can be placed on top of their painting. No ripping or tearing in sight. This approach might loose a little of that stained glass effect but it’s still super lovely! Notice that crown is not glued down to the top of that sheet…avoid the zig and zag : )
But wait, don’t put the tissue paper away just yet. Head over to Shannon’s site Oh Creative Day where she is showing you how to make a brilliant (hello, disquised learning opportunities) advent and then head to Rebekah’s post on her IG feed for a lovely little holiday star garland.
We can’t wait to see your stained glass angels! Don’t forget to tag us in your #CRAFTMAS #CRAFTMAS2019 project pics!
Look how they glow at night! Grab some flame-less LED candles and get ready for the warm and cozy feels.
If you like this project you might want to check out our 24 days of ART CAMP Holiday e-Book!


