
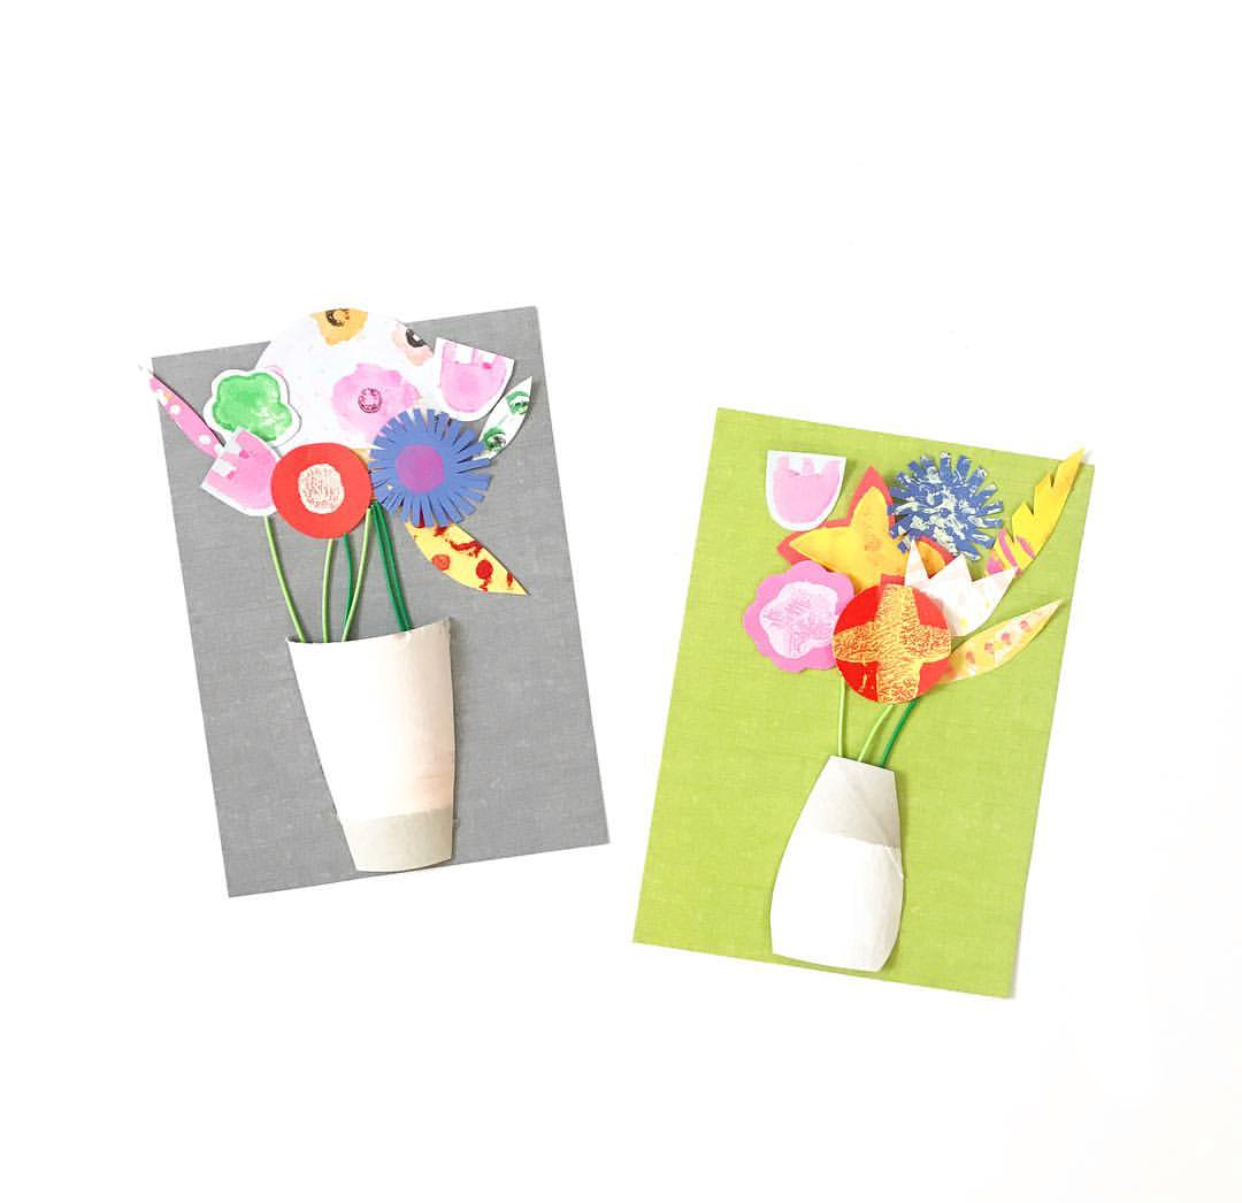
Mother's Day Printmaking Bouquet
If I know what love is
it's because of you.
- Herman Hesse
Have you ever made your own stamps? It is so much fun! This project combines DIY stamp making, printing and paper cutting and it results in a beautiful keepsake for mom or a special someone! You can scale it down to fit on a greeting card or go a little bigger and make a framed work of art. You may want to save some of your flower and leaf prints to make a wreath!

Materials:
colored card stock and/or scrapbook paper
assorted textural elements: buttons, beads, rubber bands, rice, straws, sticks, pencil eraser
acrylic and/or tempera paint
** Please note that we participate in the Amazon Affiliate program. This means if you purchase any of the products linked here we will receive a tiny sales commission at no additional cost to you. We only link to products we use and love. Your support helps us keep this site running - thank you!
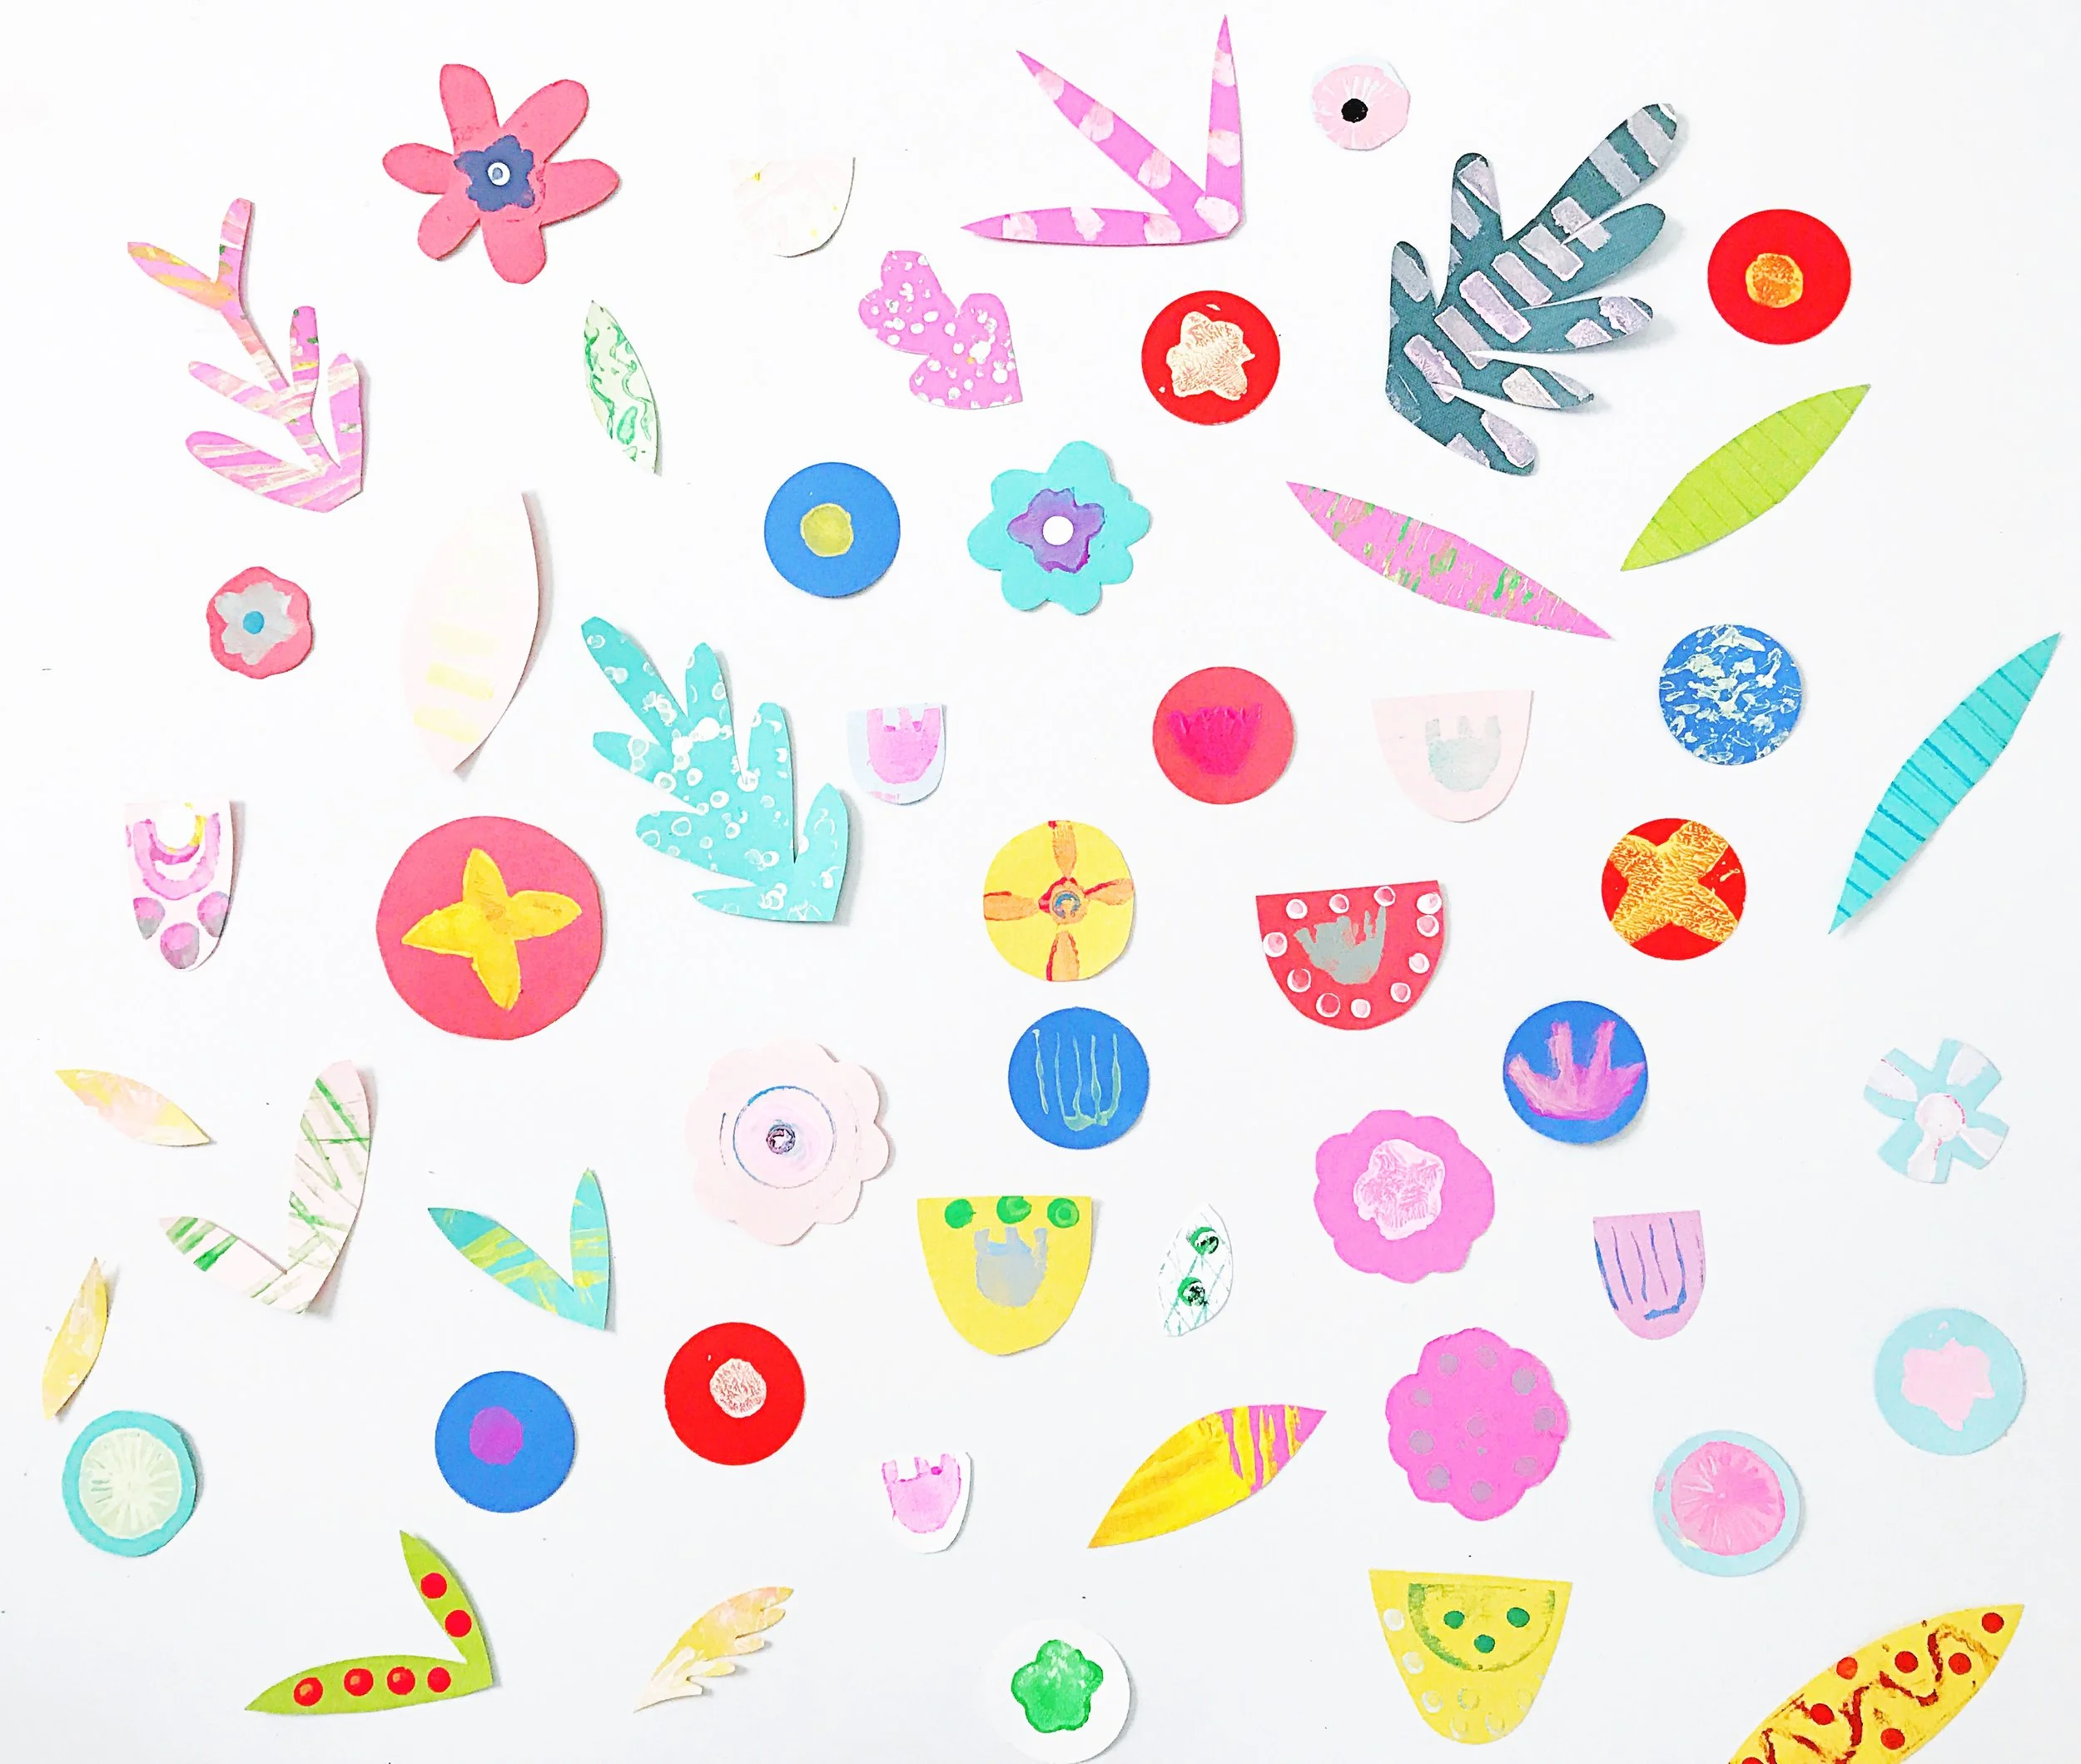
1. Gather your scrapbook paper or card stock and start to cut out circles, leaves, and simple flower shapes.

2. Begin to create your stamps. We focused on simple designs that could be printed in the center of our flower shapes and leaves.
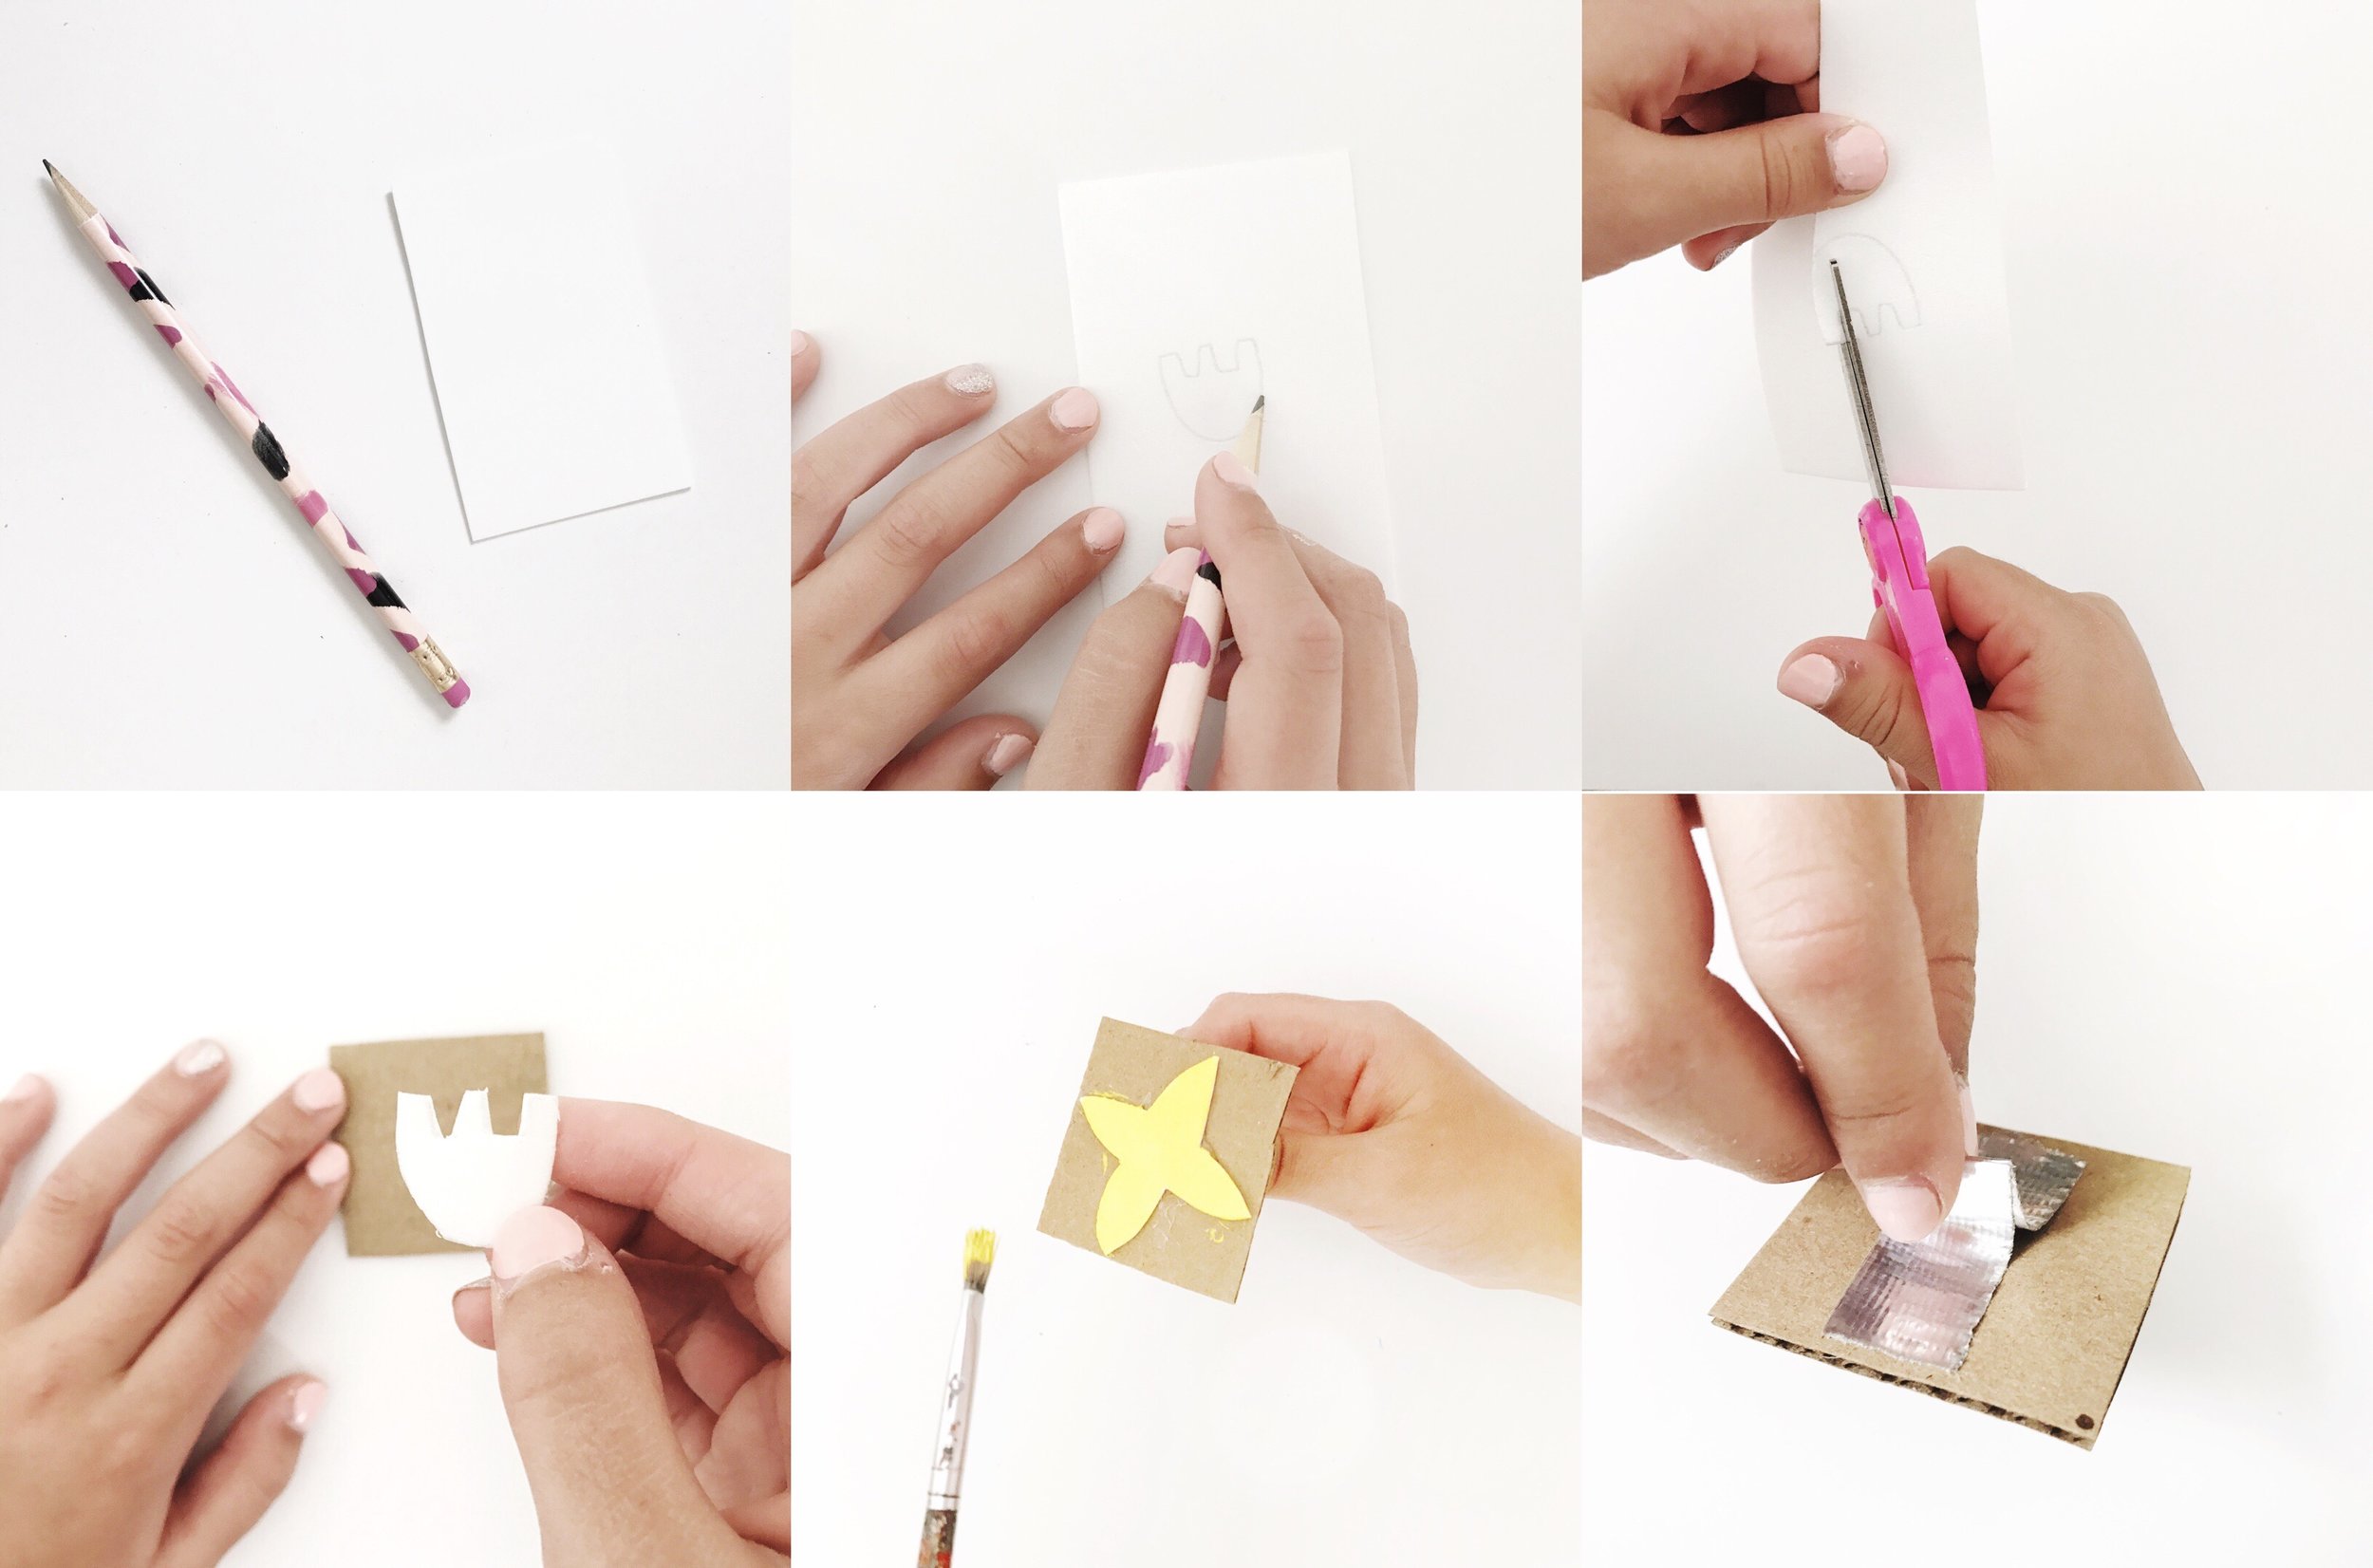
1. Trace your design on foam with a semi-dull pencil. 2. Cut your foam shape out. 3. Glue your foam shape onto a piece of cardboard or a wooden block. 4. You can use paint or an ink pad to print your design. 5. Create a handle for your stamp out of tape.
3. Create a variety of print textures by using a combination of cut foam, hot glue designs, and textural elements (string, beads, rice, rubber bands...)

4. Ink your "printing plates". If you are using paint you can add color with a brush.


5. We alternated between ink pads and acrylic and tempera paint. This is a great opportunity to sneak in a little color theory.
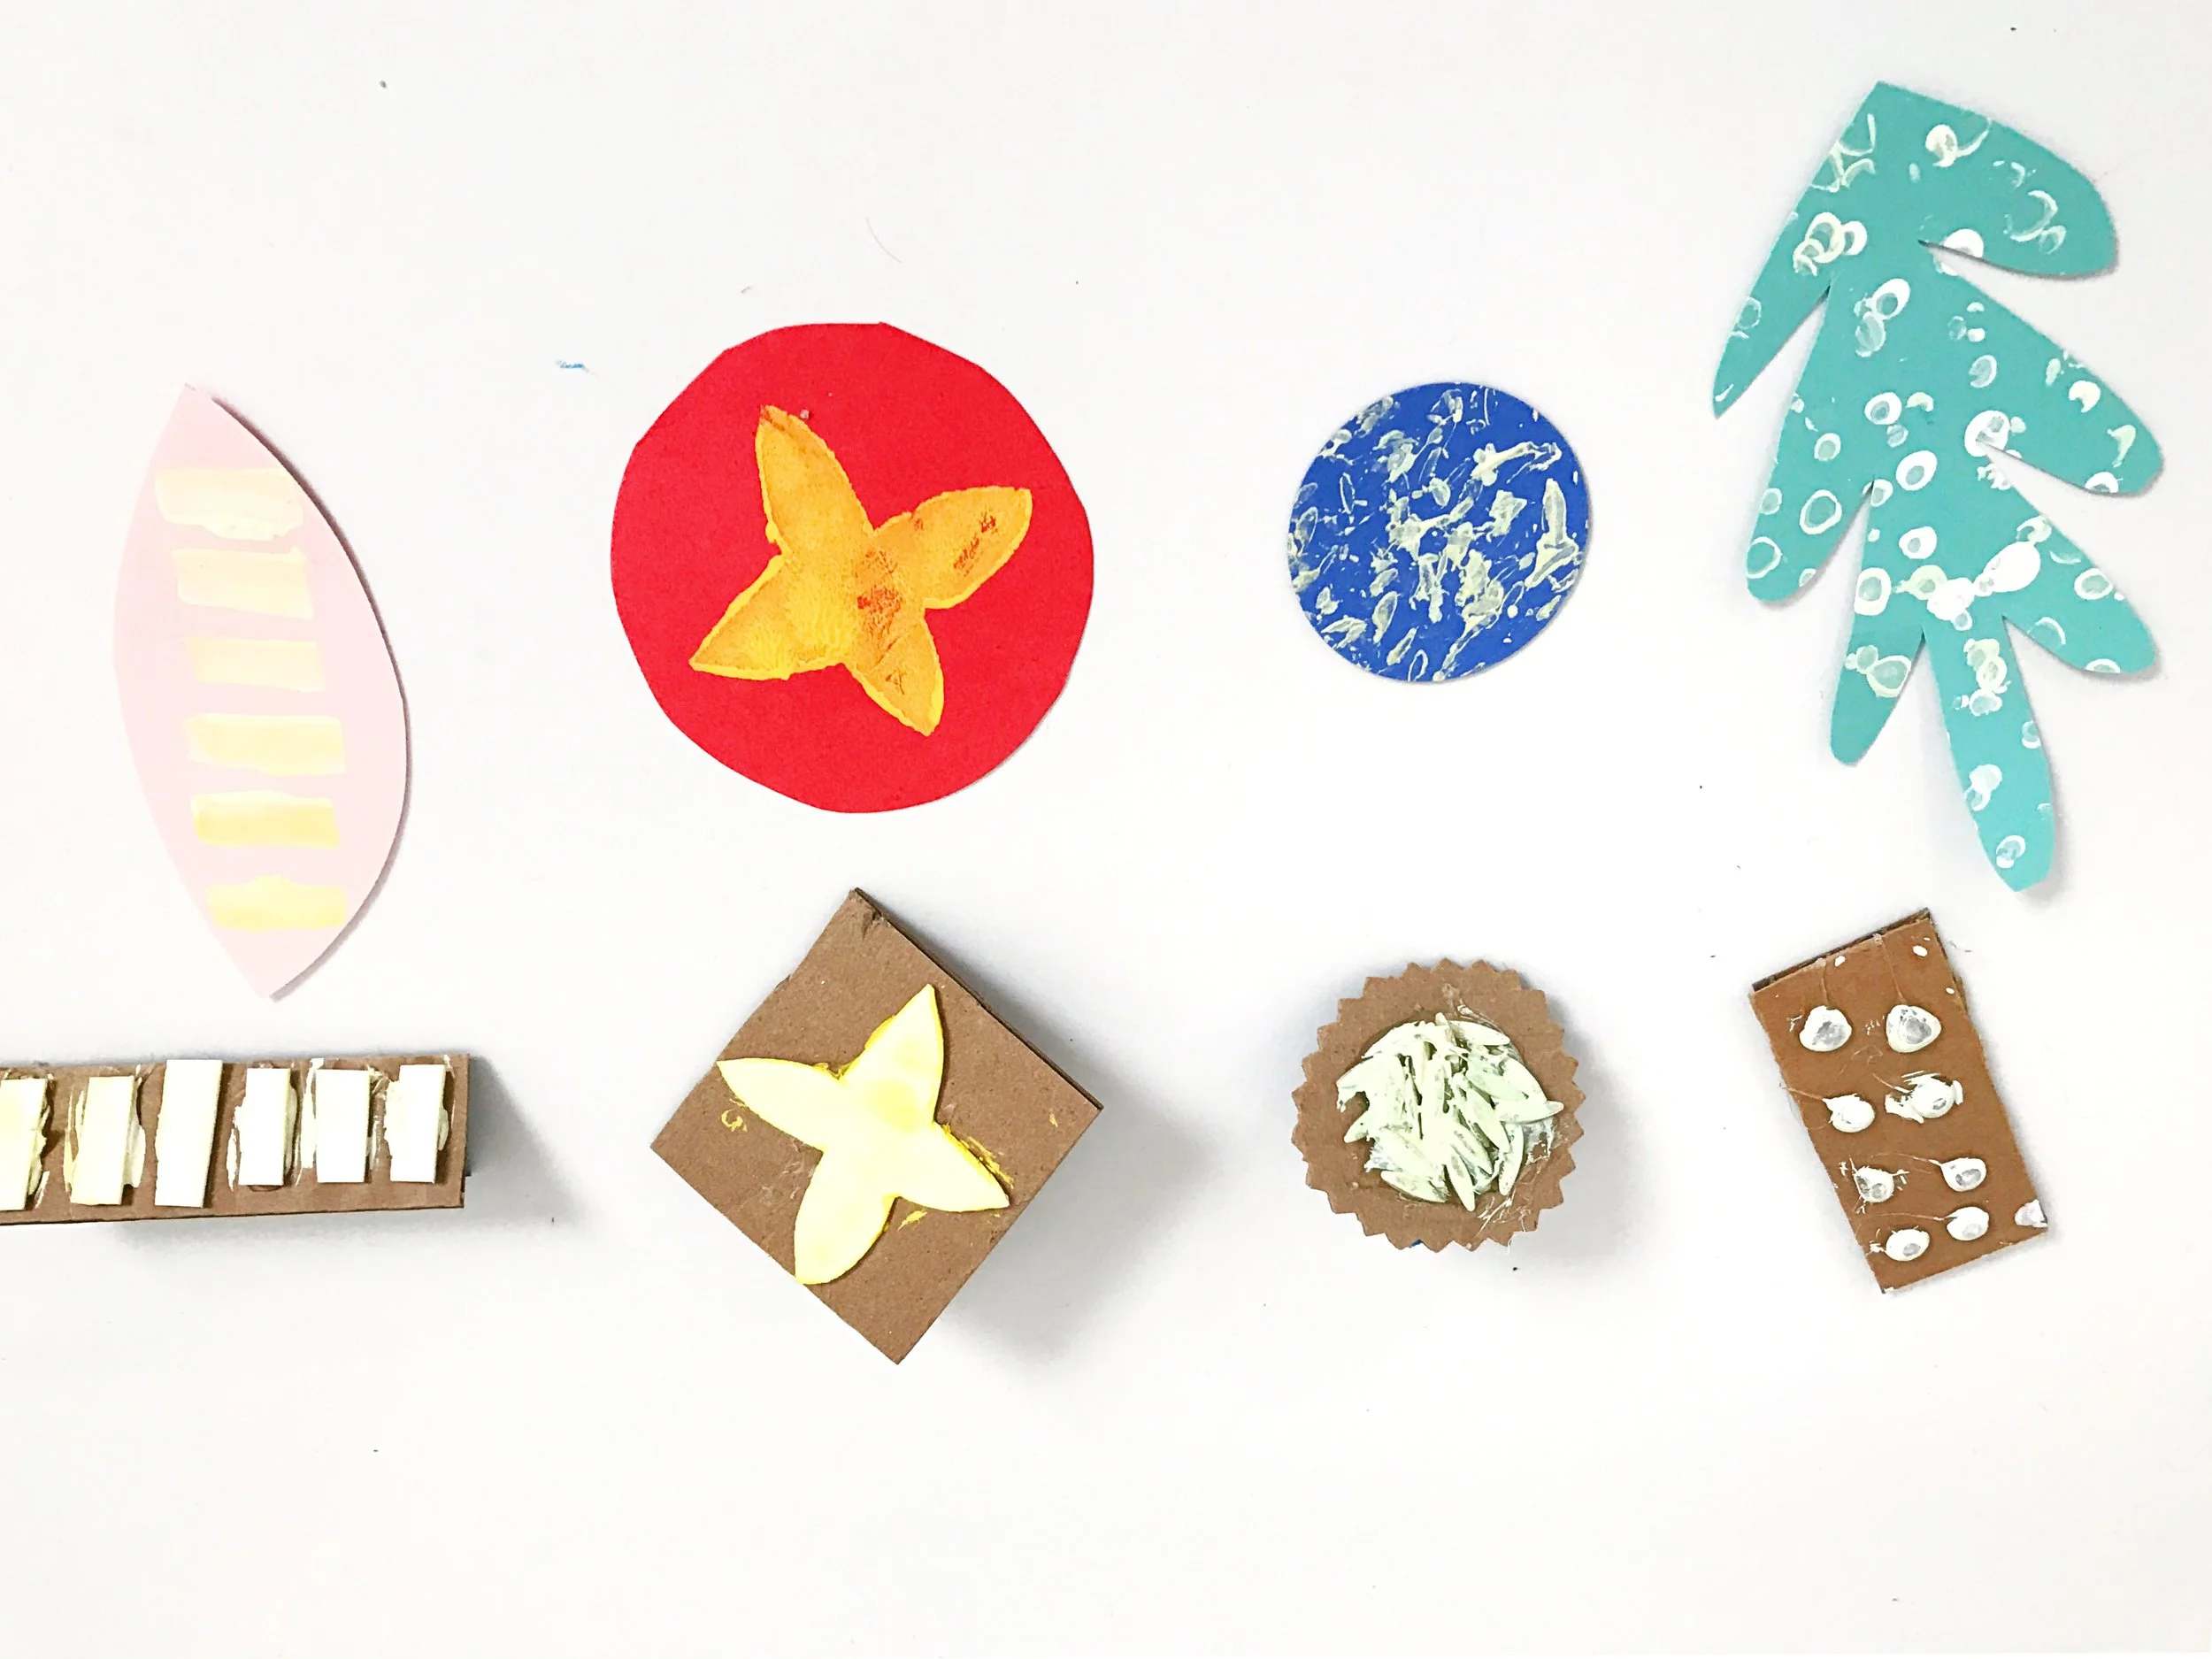
6. Once you have stamped all your wild flowers you will let them dry. Once they are dry you can go in and add another layer of printing and additional colors. Our final layer was printing little dots in the center of some of our blooms with a pencil eraser.
7. Select your colored paper for your background, bendy wire (or skinny strips of paper or craft foam) for your stems and a paper tube. You will start by cutting your paper tube in half. Trim the paper tube until you get the vase shape you are looking for. If you want to add color to your vase now is the time! Attach your stems to the back ground paper with hot glue and then attach your vase to the background on top of the stems. Attach the vase by running a line of hot glue down both sides of your paper tube. You want to hold your sides down until the glue sets to the paper.

8. After the vase is attached you will add your flower heads and leaves. If you want to give your flowers more of a 3-d pop consider mounting the flower heads with foam dots! You now have a beautiful printed bouquet! You can mount your bouquets on a blank greeting card or turn them into wall art with a simple frame!


