Magic Tree

Trees are poems the earth writes upon the sky.
- Kahlil Gibran
There is a church in my mom’s neighborhood that has the most beautiful yarn wrapped trees standing out front. We first spotted them years ago when my girls were itty bittys and they quickly became known as the “magic trees”. The magic trees have been the focal point of many a bed time story and improvised fairy tale at our house, so it was only a matter of time before they made their way into an ART CAMP project.
This project is similiar to a yarn wrapped branch DIY but it's made more accesible because it's not dependent on a found natural element but instead designed and engineered from rolled magazine paper. Because of this, I think it is a great way to introduce yarn wrapping to a large group of students!
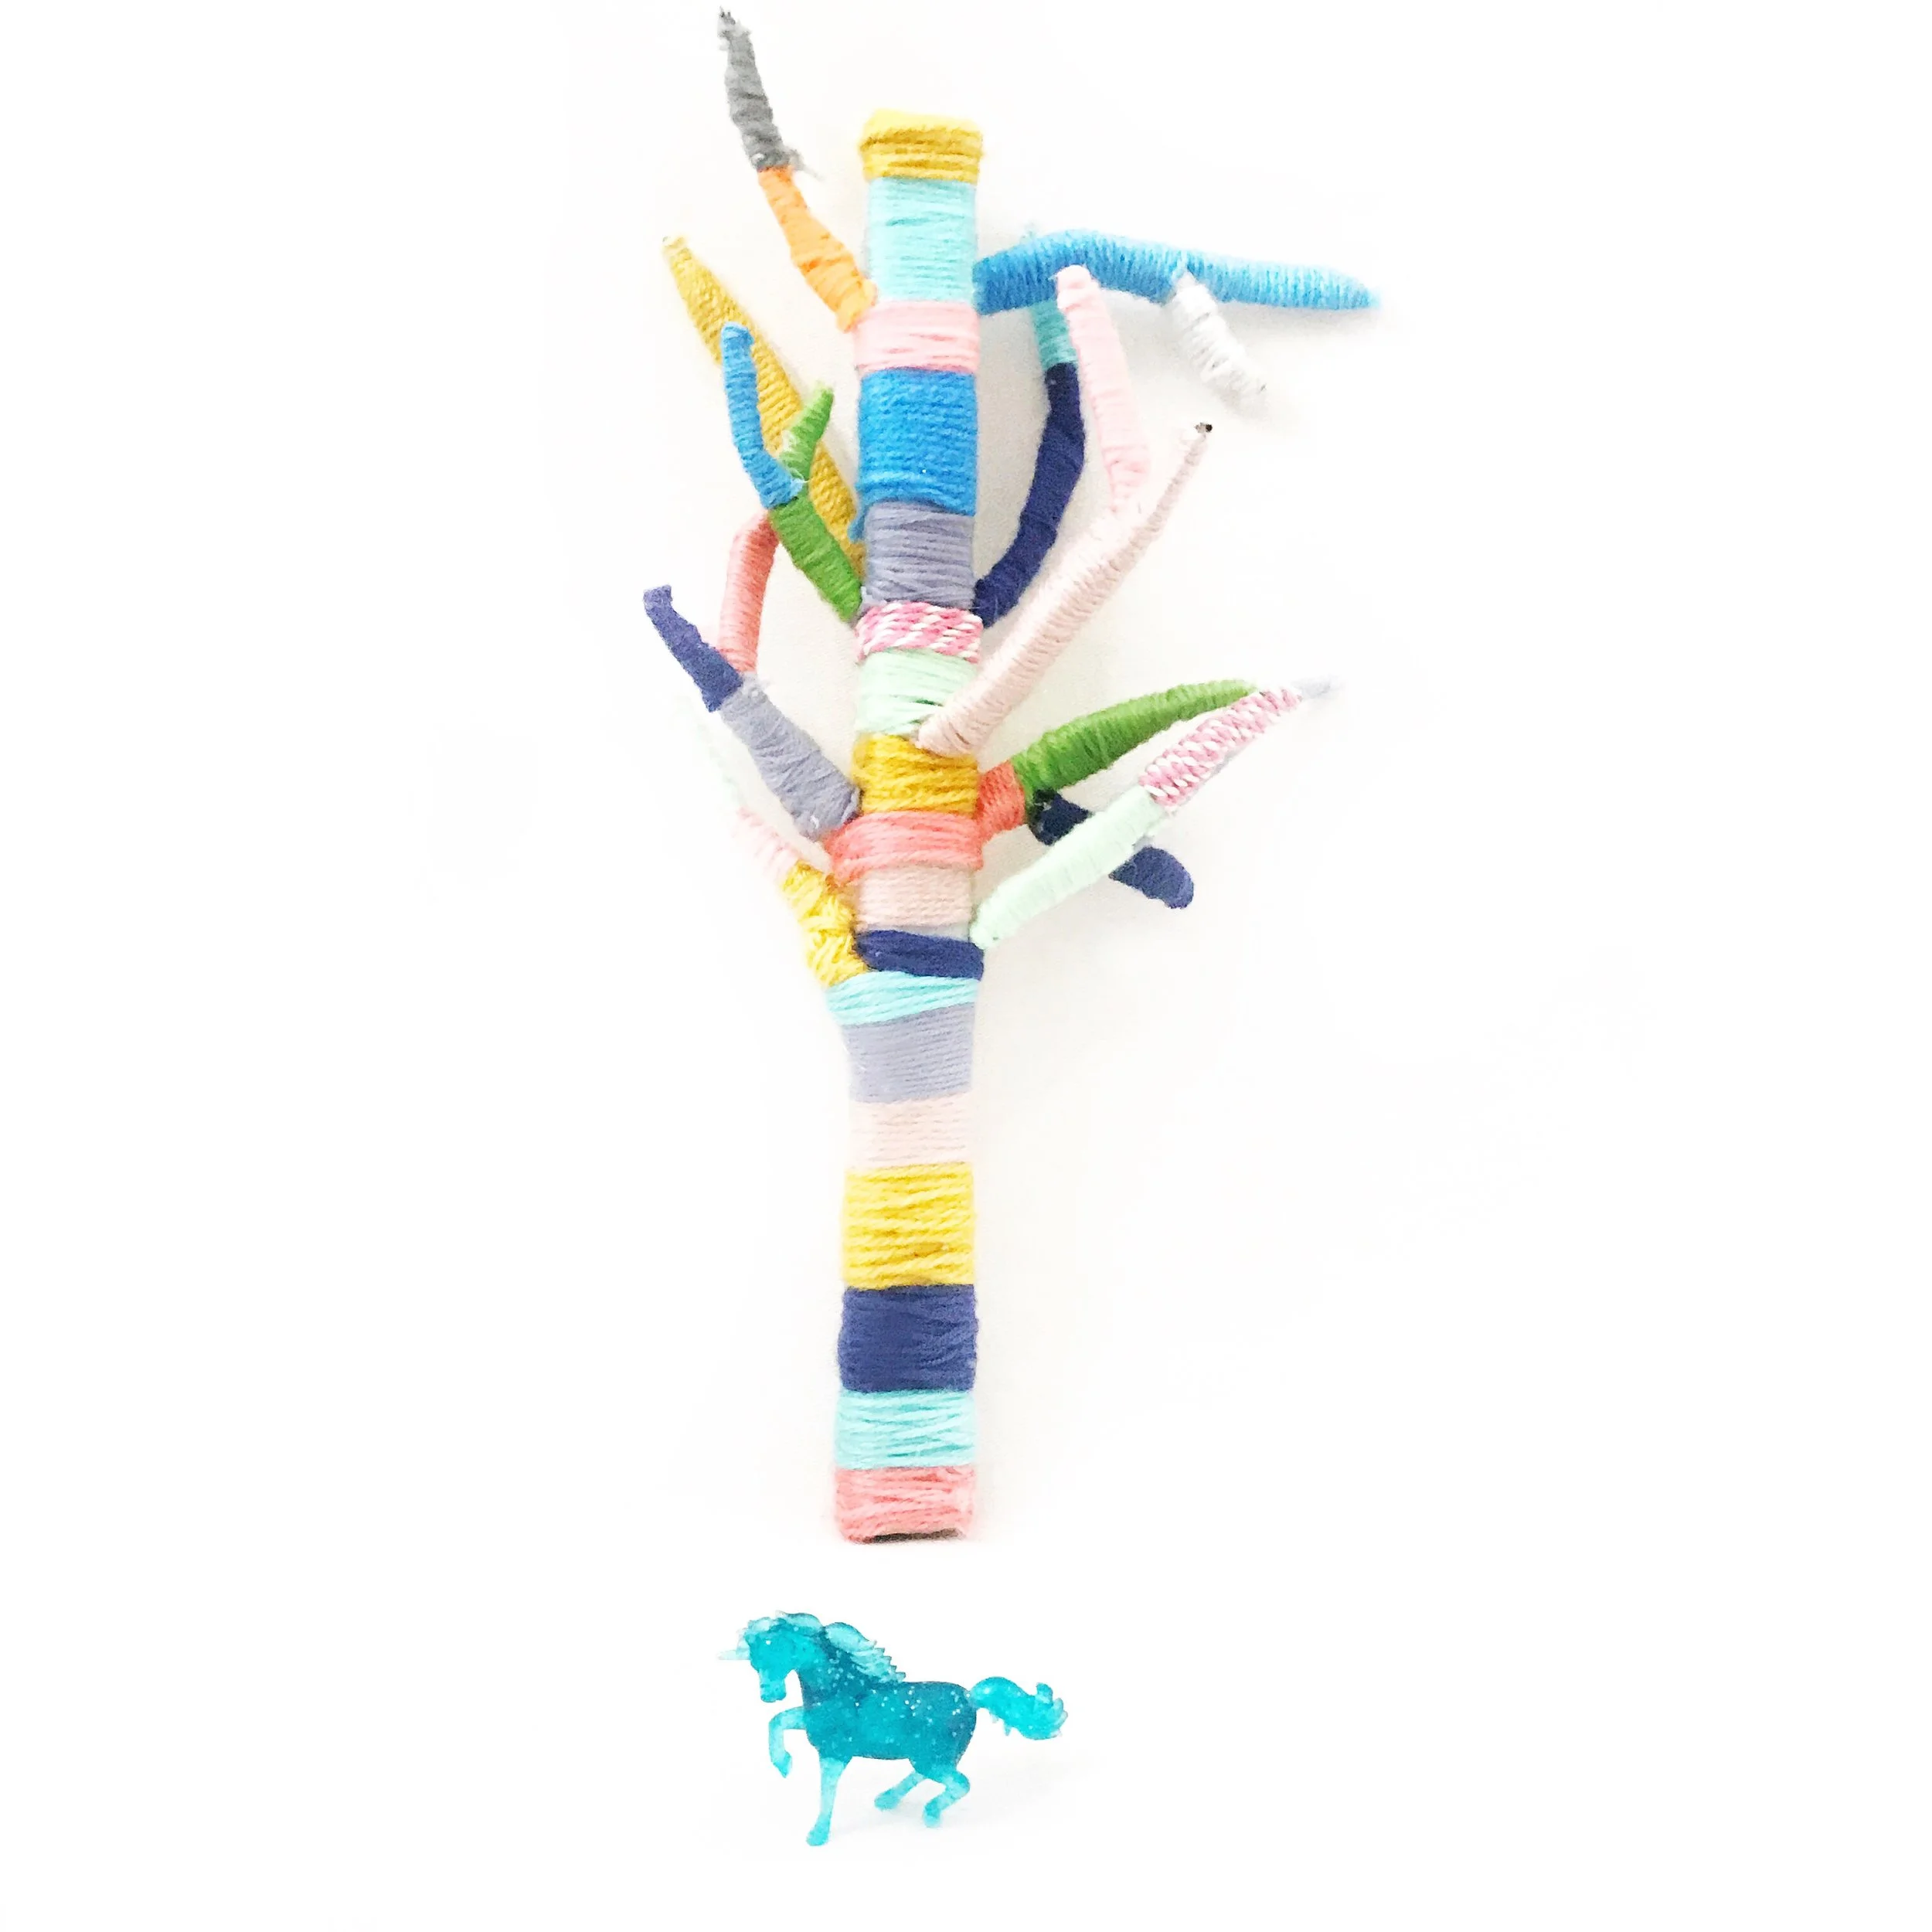
The girls and I worked on it as a team. Ri rolled, I taped, and we all took turns wrapping the trunk and limbs. The magic tree is now taking center stage in small world imaginary play scenes like the herd of unicorns and ponies you see dancing around the tree in the pictures below.
Happy making, y'all!

Materials:
magazine
masking tape
hot glue gun
scissors
yarn in assorted colors

BUILD:
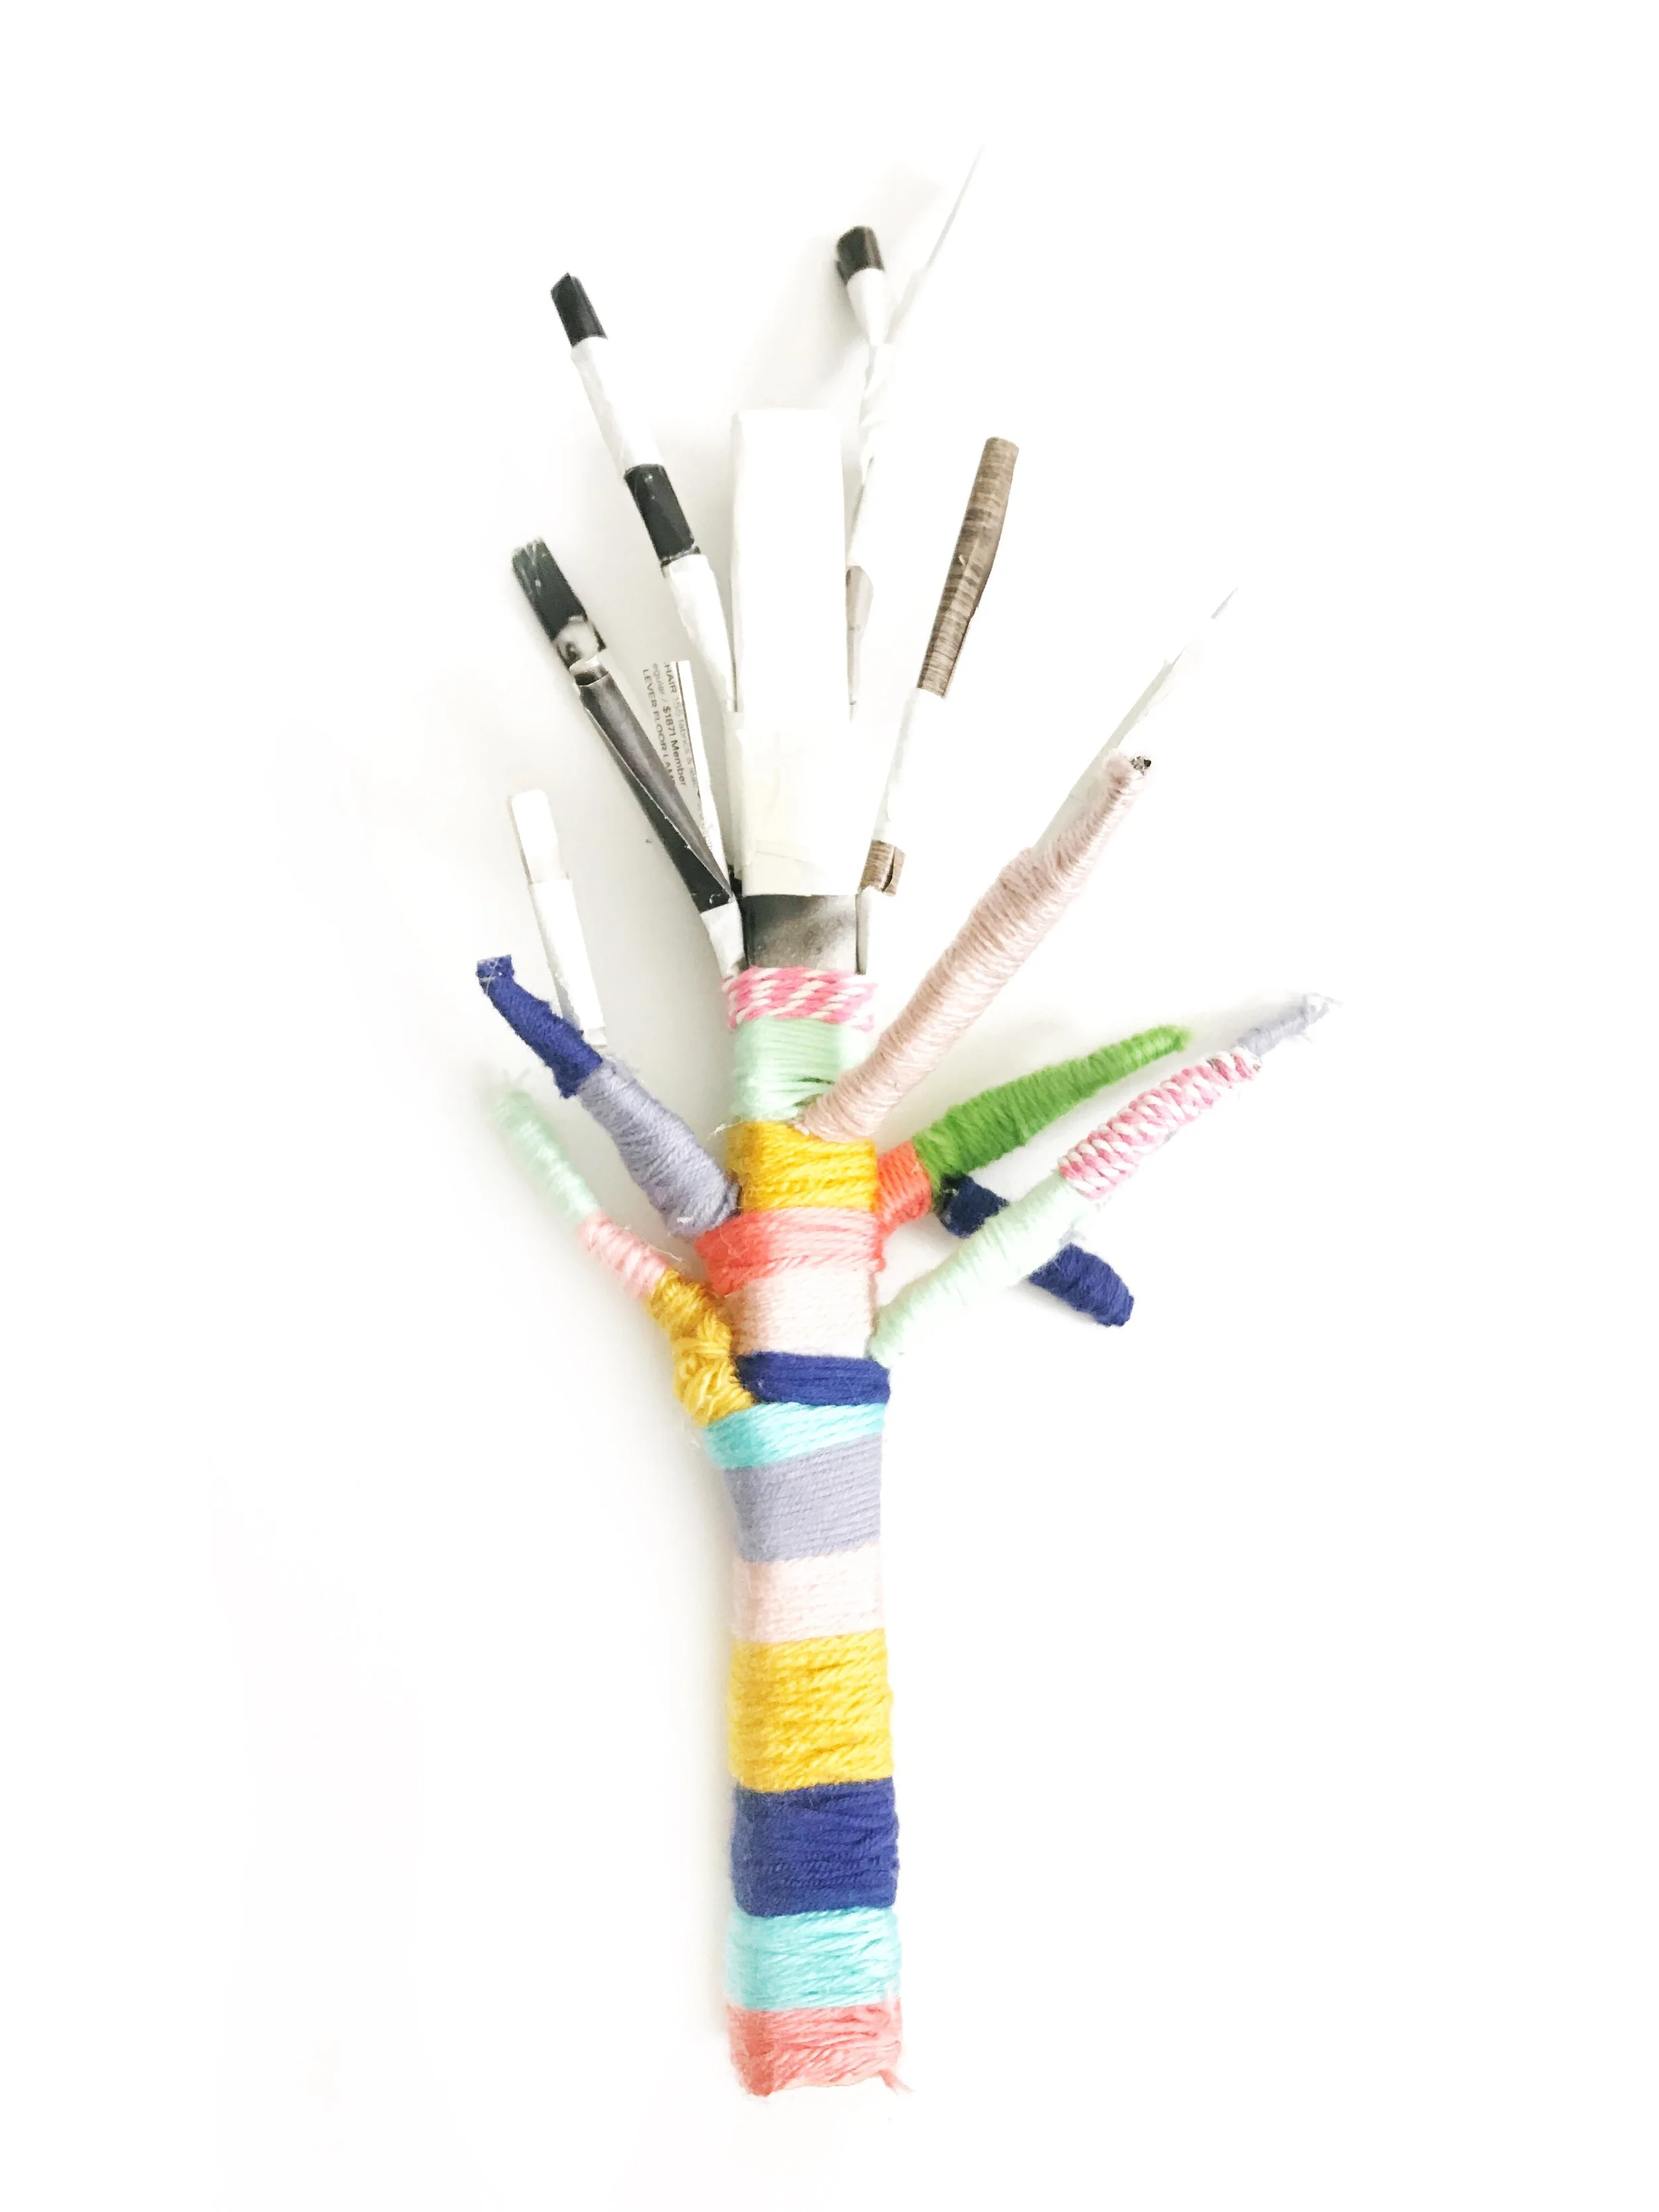
We started out the process of building our tree by rolling the cover of the magazine into a trunk shape. If you are working with older artists, they could probably experiment with tapering and splaying their paper roll to achieve more realistic trunk dimensions. We kept our shape very basic because the girls really wanted to get to the yarn wrapping!
You can create skinnier branches by rolling your paper tighter and wider branches by loosening the roll up a bit. When you have gotten the roll where you want it, just add some tape to keep it together. Start to attach your branches to your trunk with the masking tape. Continue this process of rolling, taping, and attaching until you are satisfied with your tree structure.

WRAP:
We started at the base of the tree and worked our way up, changing yarn colors as we went. I started each new yarn strand by adding a tiny drop of hot glue to fasten the end of the yarn to the tree and then the girls went to town with the wrapping. The tree wrapping takes a bit of fine motor coordination and patience so it is nice to work as a team. When one person gets tired they can just pass it to the next. This is also a project that could be spread out over days or weeks.
Little by little, the colorful tree starts to take form...
...and before you know it, your magic tree is finished and a herd of unicorn and pony friends have joined the party!! 😉