Egg Carton Fairy Dolls
Some things have to be believed to be seen.
- Madeleine L'engle
The girls and I have been so happy to see the endless stream of Egg Carton Mermaid Dolls that are being created and shared on the interwebs. Never in our wildest dreams did we expect that the result of our sleepy Saturday morning craft session would become a viral sensation. Wavy, Splash, and Breeze aren't letting the fame go to their tails, though. They are still the humble, playful gals they've always been. They have been such loyal companions to H and R we thought we would surprise them with an island getaway. Breeze has been dreaming of a Maui vacation since she was a tiny little mer-pole so it was not even a question of where they would be heading. We threw them an intimate little bon voyage party and they promised to send postcards. They will be back before the end of summer so they can send the girls off on their first day of school.
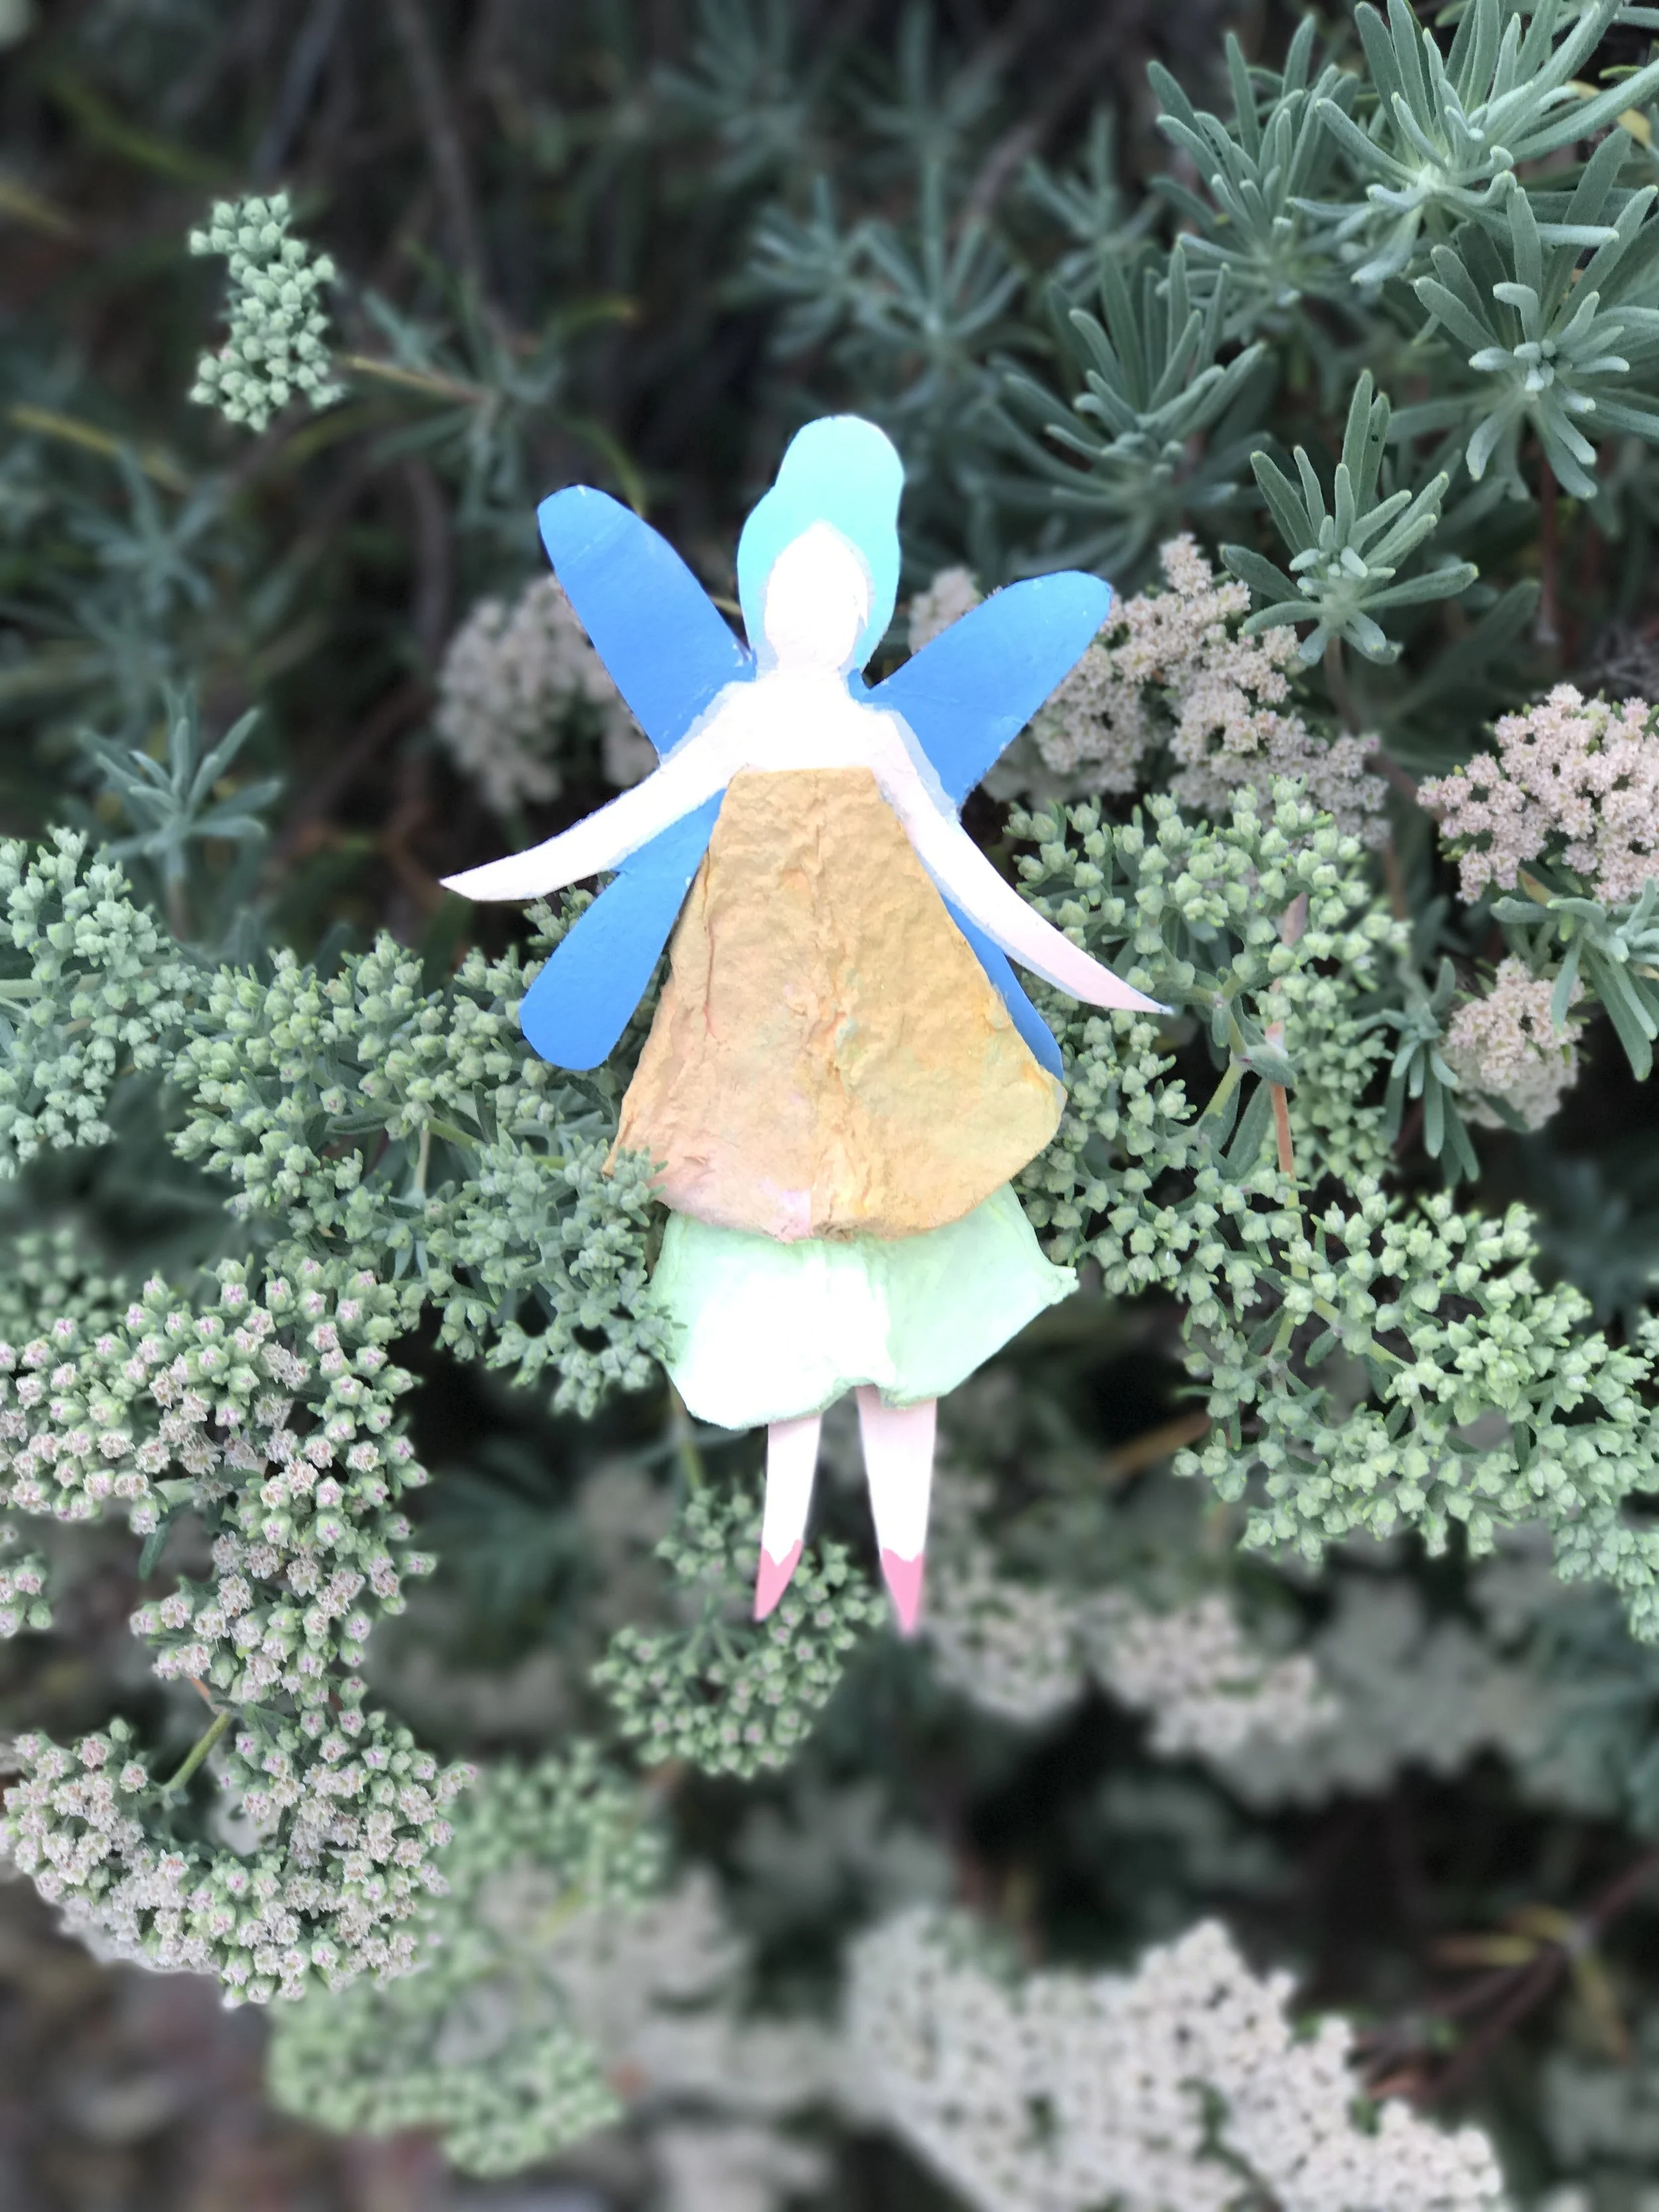
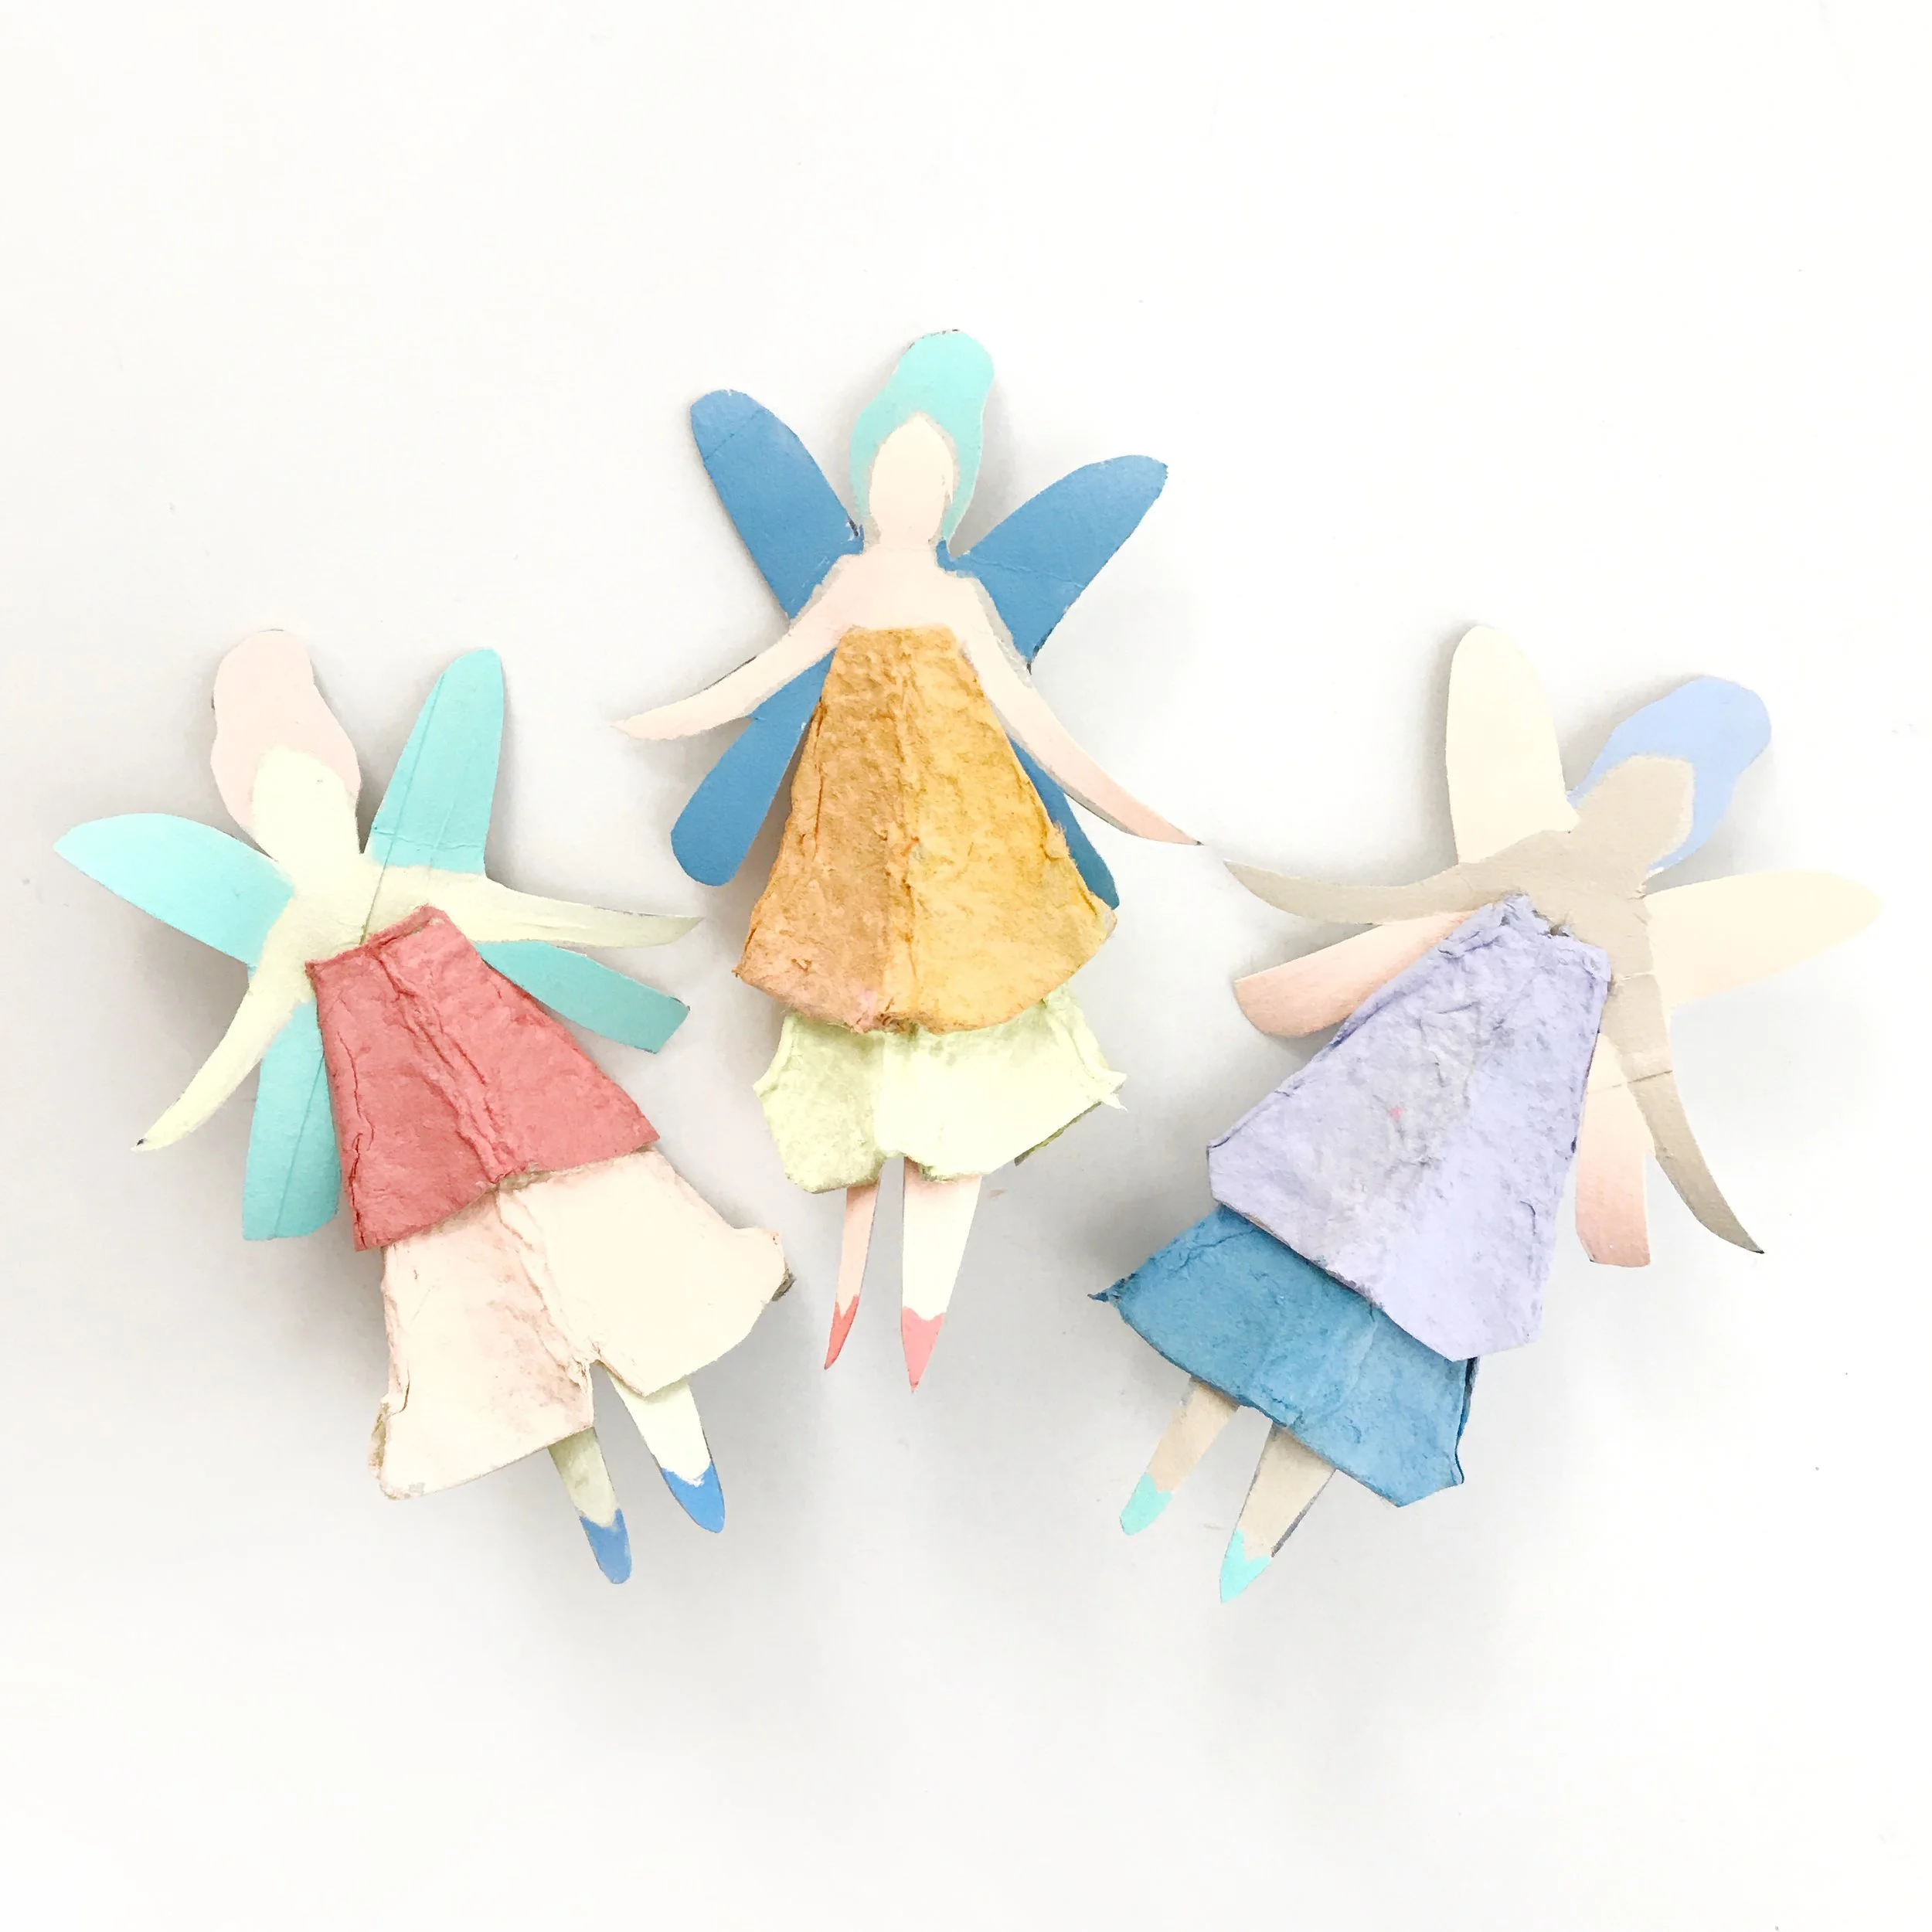
We have to admit that it has been a little lonely since the Mers left town. So it probably won't come as a surprise that this morning's family craft session was all about the egg carton doll. Without further adieu, meet our fairy friends: Mags, Blossom, Trudie, and Blue. They are spunky little sprites with BIG SWEET TOOTHS. I found Mags face down in the honey pot sawing Zzzzzzs this afternoon. H pointed out that it is now Mag's personal honey pot because germs are germs... magical fairy or not.
If you'd like to see the video tutorial for this project, check out our YouTube channel. Don't forget to subscribe!

Materials:
egg carton - you will need two pointed sections for each fairy
paper roll - you will need 1 roll per fairy
acrylic or tempera paint + palette for color mixing
hot glue gun (you can use school glue too but you will have to account for drying time)
small brush and water cup
fine point pen or pencil
scissors

1. Deconstruct your egg carton. You want a single row of pointy peeks . 2. Separate the peeks into individual pieces. 3. Trim your sections into a fairy dress shape. 4. Once you have trimmed and shaped your dresses you will begin to paint. We mixed white paint with various shades of purple, blue, greens, pinks, and yellows to achieve our fairy palette (see first photo for a picture of our paint colors).
Print our fairy template or draw your own. If you are using our template, it is the appropriate scale for a paper roll.

Cut your fairy shape out into two parts: torso/head/wings and legs. Your egg carton dresses will connect the two halves of your fairy. Once you have cut your sections out you will trace them onto your paper roll. The paper roll is more durable than paper and it will stand up to small hands and fairy play. Once your shapes are traced onto your cardboard roll you will cut them out. If you are making more than one fairy, repeat these steps until you have all the parts that you will need.

Start to paint your fairy sections. Have fun with your colors!

Wait 30 minutes for your paint to dry and then you can start to assemble. You will cut a slit in the top of the pointy egg carton section (the dress). Add a dab of hot glue to your fairy's chest and pull up her dress, pressing into the hot glue to form a bond. If you are adding a second layer to your fairy's dress (like we did) you will place a dab of hot glue on the top front of your second dress layer and slide it into the first layer, pressing the two together to create a tight glue seal. Add a dab of hot glue to the tops of your fairy legs and attach them to the inside of the dress's bottom hem. You only want a little bit of leg, ankle, and shoe showing (see below).


Once your fairies are fully assembled, take them outside for a garden party!