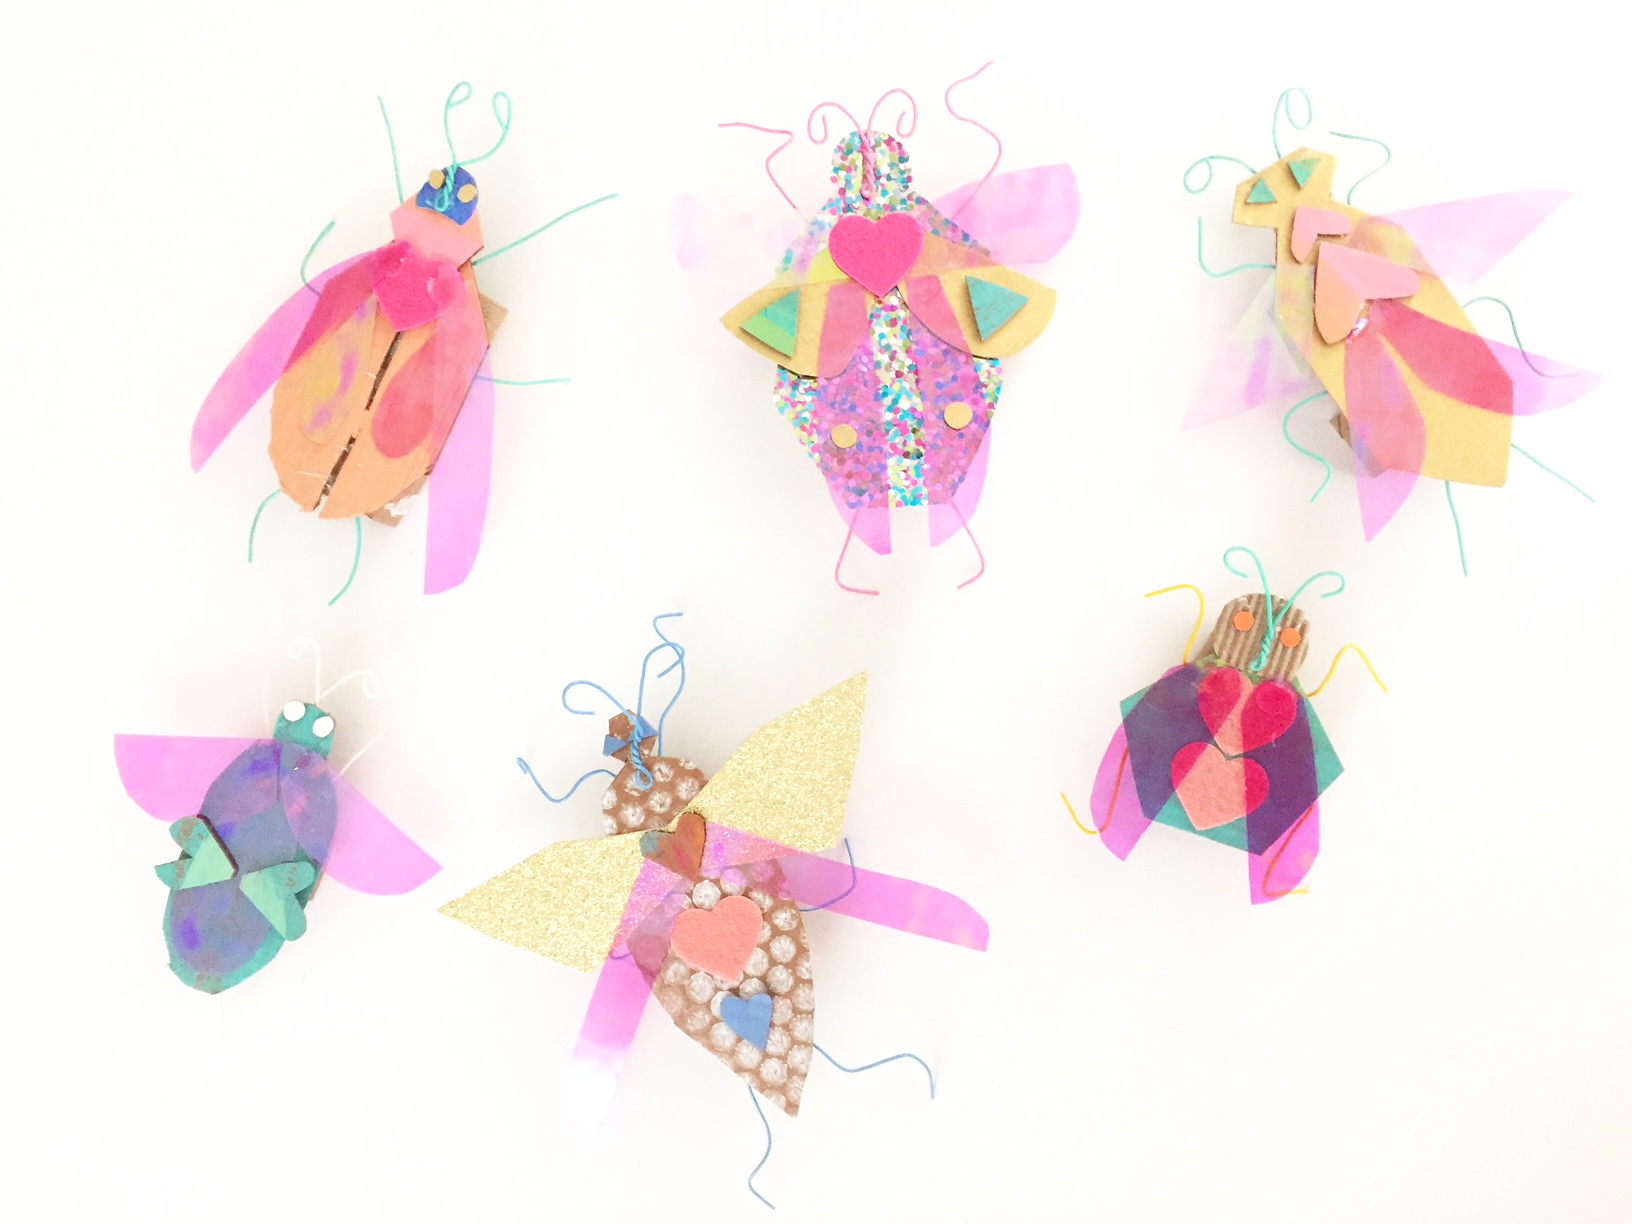
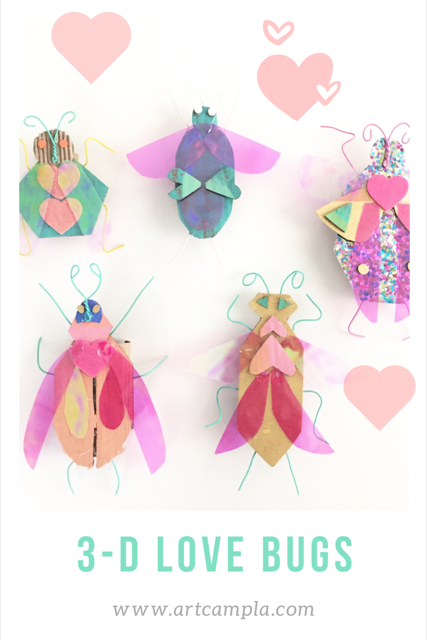
3-D Love Bugs

"Do not resist chances. Take them like vitamins."
- Anonymous
You know what I love most about teaching little ones? They take chances. LOTS of them. Last week in the art room I had a kindergartner (a lil lad I met only two weeks prior) who told me he was the "greatest beat boxer of all time" (if you aren't familiar with the art of beat boxing check out this video). In the first 2 minutes of class my friend decided to change his name to "CJ" and asked if I could announce him as he walked in the classroom (for the second time). He then went on to tell me that he had been to the sun (twice) without getting burned because he "has special skin". "CJ" spent 15 minutes on our project of the day and the rest of his class time creating spyware trackers and black hole finders out of construction paper and glue. His out-of-this-world-imagination-play was contagious and before you knew it, I was talking in an English brogue and telling the tale of my maiden voyage to Antarctica on the SS Silver Spur. These little people keep my creativity limber!
This 3-D bug project was a huge hit with the K-6 crowd. We added hearts to ours and called them love bugs ('Tis the season) but this project could be done year round, with or without the hearts. Enjoy!

Materials:
colored card stock and/or painted cardboard
color-coated bendy wire
scissors
hot glue gun
TP rolls (1/4 roll per bug)
assorted craft papers - glitter, metallic, cellophane...
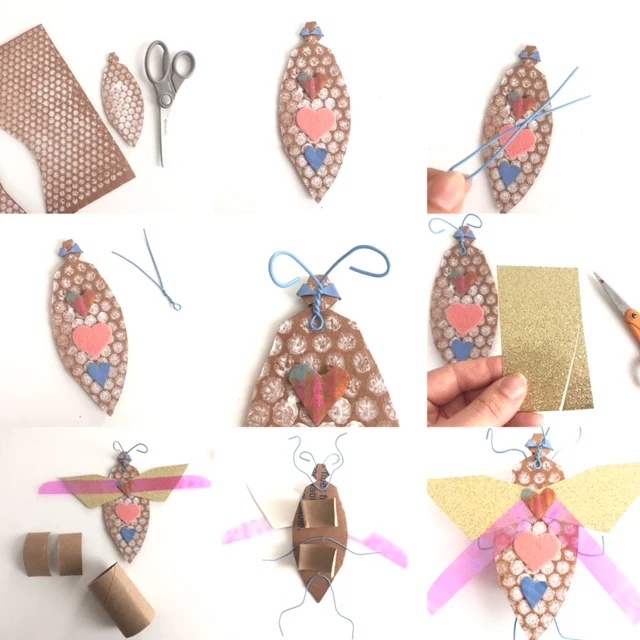
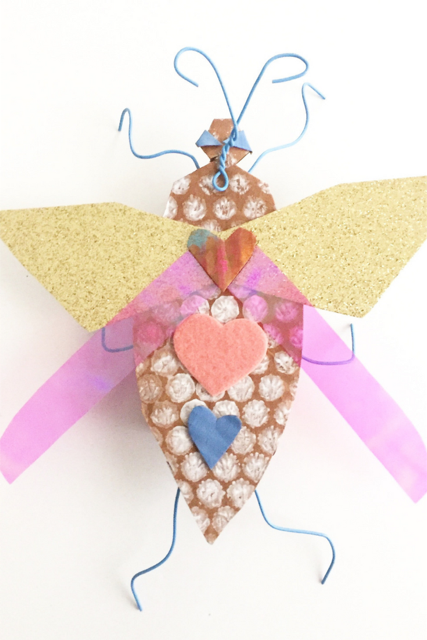
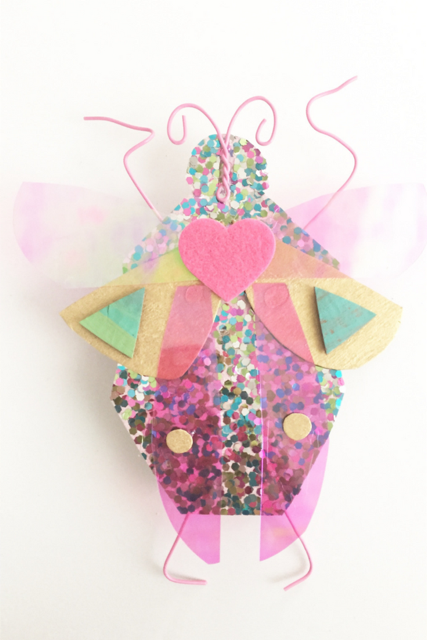
1. Cut your bug body shape out of recycled cardboard (the cardboard here was printed with bubble wrap) or card stock. If you are doing these with really little ones you can pre-cut the bug shapes or have them draw their body and assist them with cutting them out. 2. Add hearts, eyes, and geometric details with hot glue or large glue dots. 3. Create your antennae out of coated bendy wire. 4. Cut your wings. 5. Add a layer of transparent wings to your bug. 6. Cut a 1/4 slice from your TP roll and then cut that in half. You will attach these to your bug's belly with hot glue so that your bug can stand. 7. While your bug is laying on its back you can attach front, mid, and hind legs with hot glue. 8. Turn your bug over and add finishing touches!
Here is an example of different options for wing placement:
1. Over. 2. Under. 3. Layered on top.